Reps app idea and initial build
The following is a log of the process of designing and building an app, while learning Swift and SwiftUI.
The following represents the result of my poking around in XCode for about 6 months. I'd like to do smaller, more regular updates. By reading this, you're helping me by providing me accountability. Thank you!
My goals for this app #
I'm interested in building apps, not just for Vision Pro but also iOS. I enjoy creating things and was looking for a new challenge last year, so when the Vision Pro was announced I thought it was a good time to learn some Swift UI.
For learning, I've been taking part in the amazing sessions over at Hacking with Swift. I'd very much recommend Paul's HWS+ program but also the 100 Days of SwiftUI is one of the best online learning resources I've ever experienced. And it's free!
I learn best when building so I also decided to build myself an app as a side project.
App idea #
My side project app idea is a bodyweight exercise tracking app, codenamed "Reps". I've been interested in callisthenics for a long time and a fan of the Convict Conditioning training approach.
I have been out of practice recently and would like to get back into training again and enjoy the structure Convict Conditioning affords. However I would like to have an app that helps with the logging, as I find keeping a log quite helpful as a motivation:
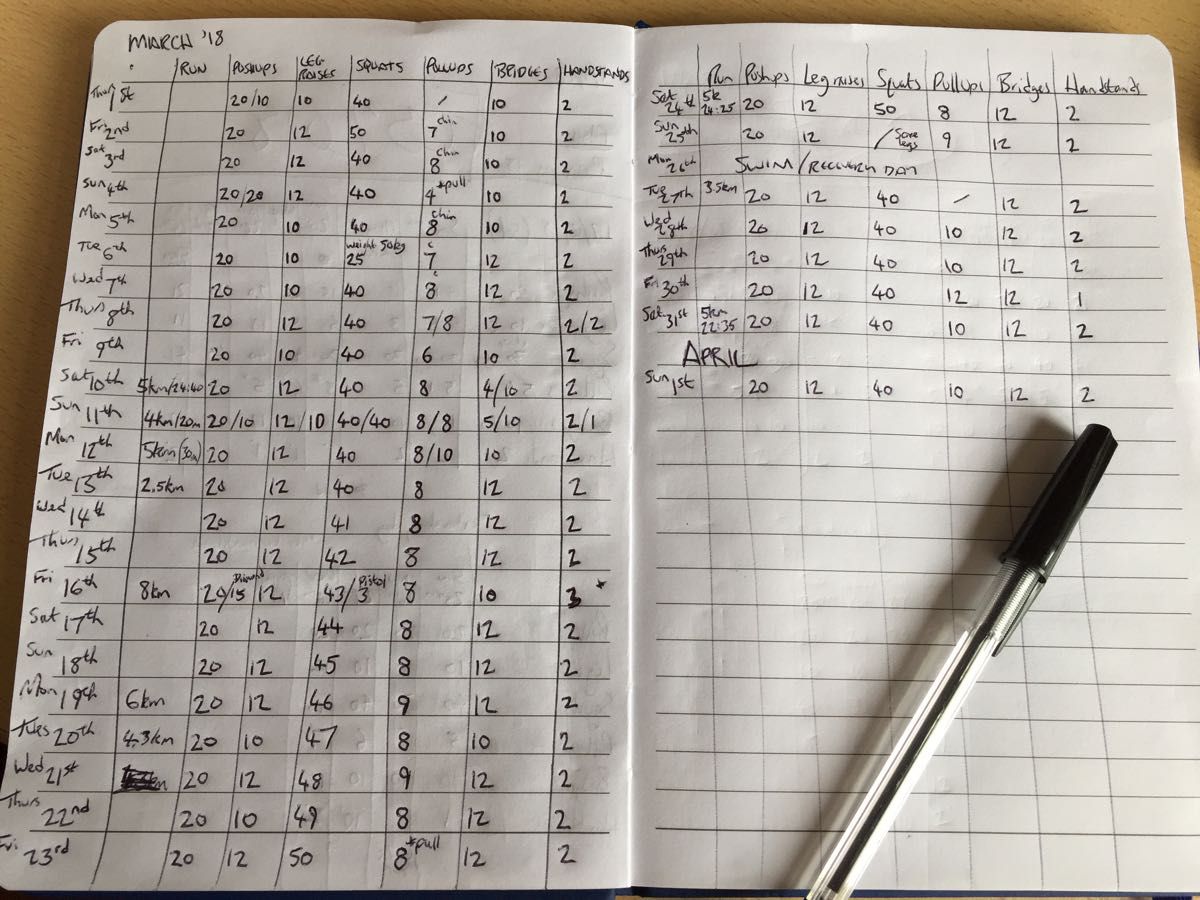
So that's where I'm starting. An app to track, log and maybe do more interesting things with training data.
Minimum viable product #
The minimum product I'll need to start is a way to set up an exercise routine, then record my reps for each exercise. Other features like analysing the saved data can wait.
This means at minimum this app will need:
- A set of data defining the exercises and their progressions
- Illustrations for each progression that help me know what the exercise involves
- A way of setting up a weekly schedule
- A way of seeing what my workout is for today
- A way to record today's exercises
Step 0: Paper sketching #
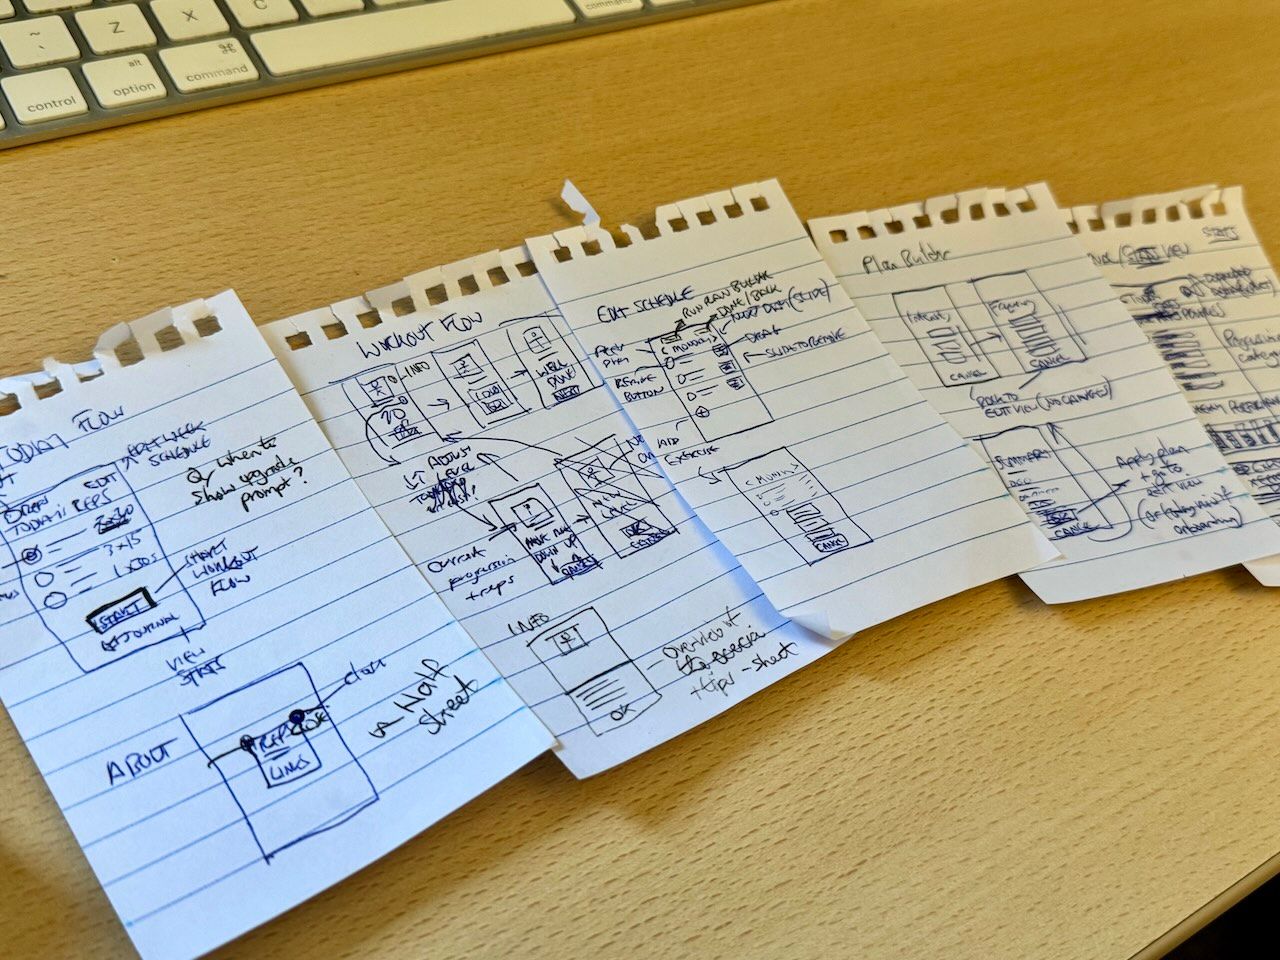
It's hard to just jump in and start coding, so I took a while to sketch out some (vague) notions for how the flows might work. While far from an actionable design, it got me thinking about the kinds of things I'd be showing and what data I would need.
Step 1: Data and data structure #
To drive the views I need to set up some useful data. The purpose of this app is to guide the user along a series of exercise progressions.
I decided to set up a structure similar to the Convict Conditioning guide. In it there are six exercise types: pushups, pullups, leg raises, squats, bridges and handstand pushups.
Each exercise type has 10 progressions, ranging from easiest to hardest. Within each progression, there are 3 levels: beginner, intermediate, and progression level (which when completed allows you to progress to the next... progression). Naming is hard.
To get it started in XCode, I set up the data like this:
let pushupDataSet: [Progression] = [
    Progression(stage: 0, type: .pushup, name: .wallPushups, reps: [
        .beginner: 10,
        .intermediate: 25,
        .progression: 50
    ], sets: [
        .beginner: 1,
        .intermediate: 2,
        .progression: 3
    ], animationFileName: "pushup-01"),
    Progression(stage: 1 //... and so on, 10 for each exercise type
In this we have the progression's stage (0 through 9), an exercise type, name, and then a dictionary for each of reps and sets.
The type is an enum of exercise types, such as .pushup, .pullup, etc. This makes it easier to use ExerciseType values in my code.
For the name, I use a LocalizedStringResource enum:
enum ProgressionName: LocalizedStringResource {
    case shortBridges = "Short bridges"
    case straightBridges = "Straight bridges"
    // etc
This will make it easier to translate than having hard-coded names in the data object.
Lastly I later added in animationFileName - this is a string referencing the file name of the animation file I'll use to illustrate each progression.
So, 6 sets of exercise progressions, each of which has their own definitions of their sets and reps.
With this data set up, I needed to learn how to make some 3D assets to illustrate them.
Step 2: Illustrations (3D animations) #
I'd like to keep my options open for porting this app to Vision Pro, and a big part of that means having 3D assets.
I have a small amount of 3D experience from back in college days but I was basically starting from scratch.
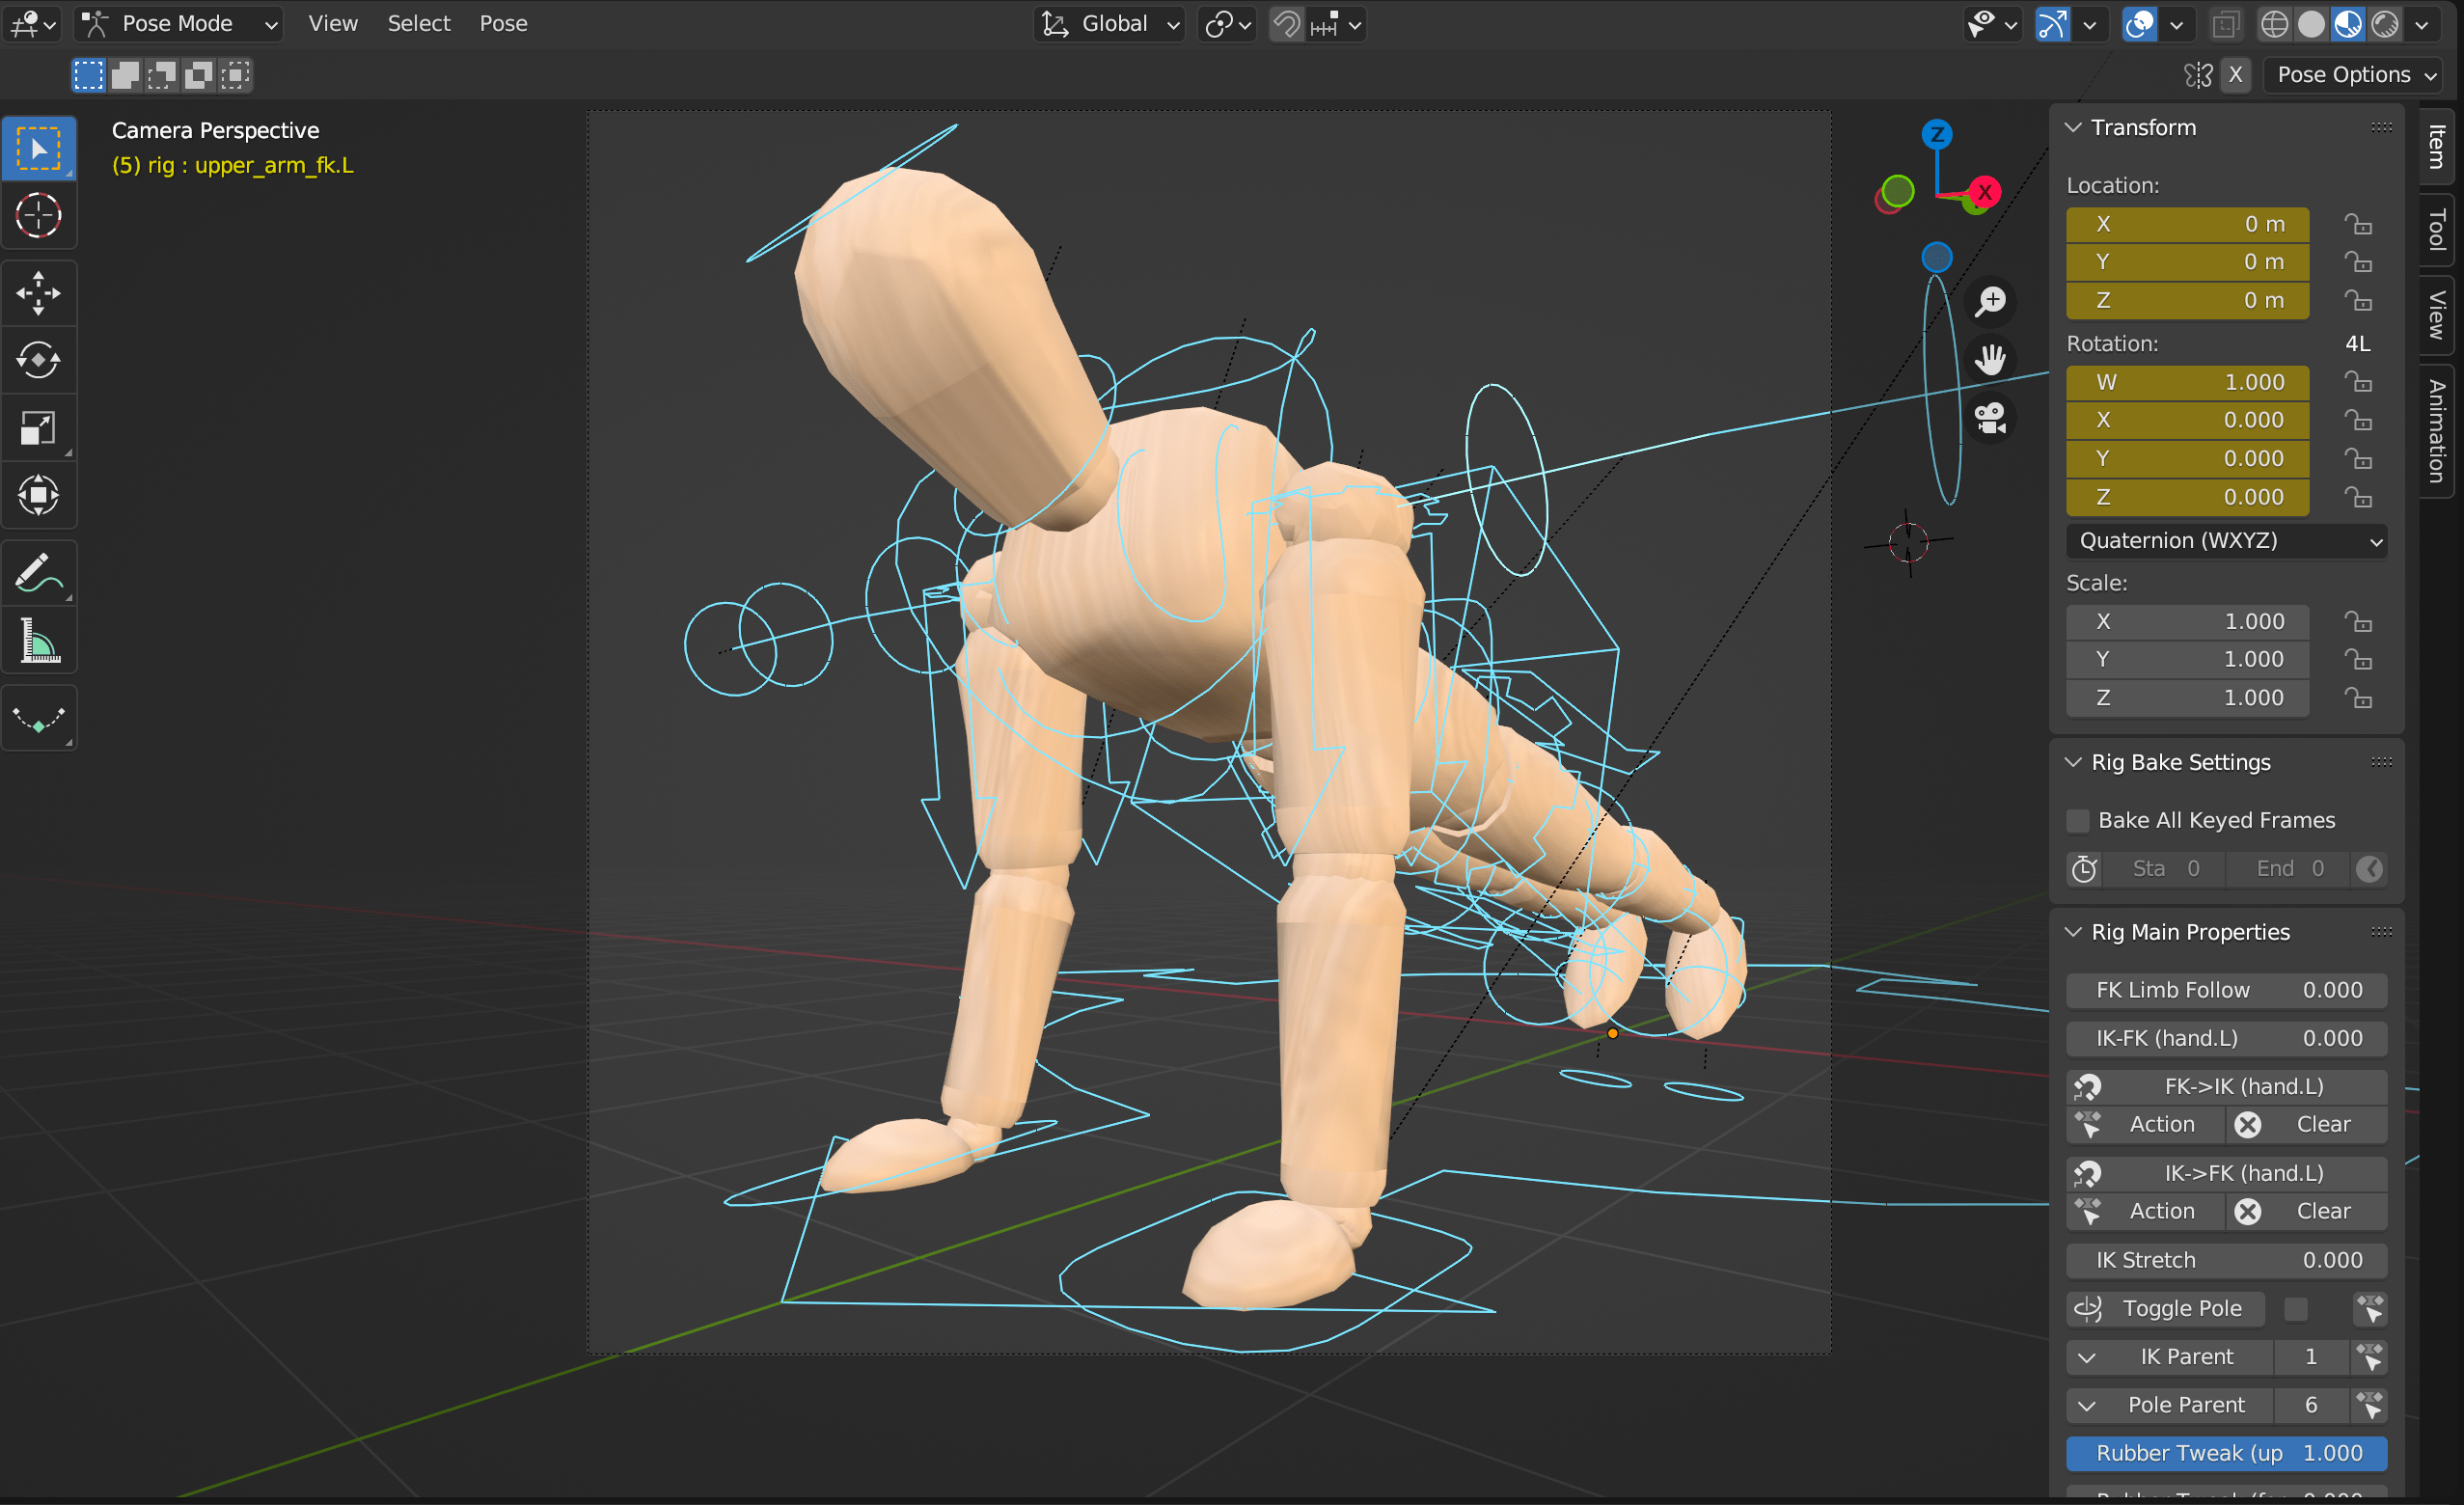
Blender #
To save some time, I downloaded this free mannequin model. I'll need to find a way to add credit in the app, but hopefully this is a start.
I wasn't able to make use of the model with the existing rig, so ended up setting up a new rig myself for positioning. I then created an animation for each of the 60 progressions.
This took a while, close to 3 months. However I really like the result. Once I made the animations, the next challenge was bringing them into XCode.
File size issues #
Embedding each animation file was over 5Mb in size. For 60 animations, that would mean at least 300Mb of files just for the animations. To work around this, I ended up saving one base model file, exported as a Collada (dae) file, and then setting up each of the others as just the animated rig without the model's mesh.
With this I could then load one 3D model, and for each animation load the animation file and apply the animation to the base model. This resulted in animation files around 1.5Mb each. I'm sure I could optimise more but bringing the assets under 100Mb seems like a good start.
Loading 3D files in Xcode #
After a lot of Google-searching, I settled on using a SceneView to load the base Collada file, as well as the animation file, then apply this animation to the scene. Lastly I also grab the camera from the animation file and apply that to the scene.
This method creates the scene and applies the animation and camera:
func loadScene(_ currentProgressionAnimationName: String, isPaused: Bool) -> SCNScene {
    guard let scene = SCNScene(named: "base-model"),
          let baseSceneSource = SCNSceneSource(url: Bundle.main.url(forResource: "base-model", withExtension: "dae")!, options: nil) else {
        print("Scene could not be loaded")
        return SCNScene()
    }

    guard let animationSceneSourceUrl = Bundle.main.url(forResource: currentProgressionAnimationName, withExtension: "dae"),
          let animationSceneSource = SCNSceneSource(url: animationSceneSourceUrl, options: nil) else {
        print("Animation file \"\(currentProgressionAnimationName)\" could not be loaded")
        return SCNScene()
    }

    let animationIdentifier = "action_container-rig"
    let cameraIdentifier = "Camera"

    if let animationObj = animationSceneSource.entryWithIdentifier(animationIdentifier,
                                                     withClass: CAAnimation.self) {
        animationObj.repeatCount = .infinity
        scene.rootNode.addAnimation(animationObj, forKey: animationIdentifier)
    }

    // Override camera position
    if let animationSceneCameraNode = animationSceneSource.entryWithIdentifier(cameraIdentifier, withClass: SCNNode.self),
       let existingCameraNode = scene.rootNode.childNode(withName: cameraIdentifier, recursively: true) {
        existingCameraNode.removeFromParentNode()
        scene.rootNode.addChildNode(animationSceneCameraNode)
    }

    scene.isPaused = isPaused
    scene.background.contents = Color.clear

    return scene
}
In a view, I can use this method it like this:
SceneView(
  scene: loadScene(animtionName),
  options: [.temporalAntialiasingEnabled] // Other options can be used for control, etc
)
Notice I've an isPaused boolean. I can use this later to generate static images from the animations for use in badges and icons.
I've also set the background to Color.clear. However, that won't work yet. I needed some more work to give the animation a clear background.
Transparent background #
Turns out a `SceneView`` doesn't support transparent backgrounds. The only way I could find to make the background transparent was to wrap the scene in a SpriteKit view:
struct AnimationSpriteView: View {
    @State var animationName: String
    var isPaused: Bool

    var createdScene: SKScene {
        let scene = SKScene()
        scene.backgroundColor = UIColor.clear
        let model = SK3DNode()
        scene.anchorPoint = CGPoint(x: 0.5, y: 0.5)
        model.scnScene = loadScene(animationName, isPaused: isPaused)
        scene.addChild(model)
        return scene
    }

    var body: some View {
        SpriteView(scene: createdScene, options: [.allowsTransparency])
    }
}
This creates a SK3DNode as a model into which I load the scene above. I had to hack at the anchorPoint a bit, to get the model to sit correctly in the scene but these values seemed to work.
Generating icons #
With animations, I can now create posed versions to use as icons. I'm jumping around a bit here, I did the icons much more recently but it fits better here.
Since the animations have a transparent background, I can add some shapes behind and apply effects to make some icons:
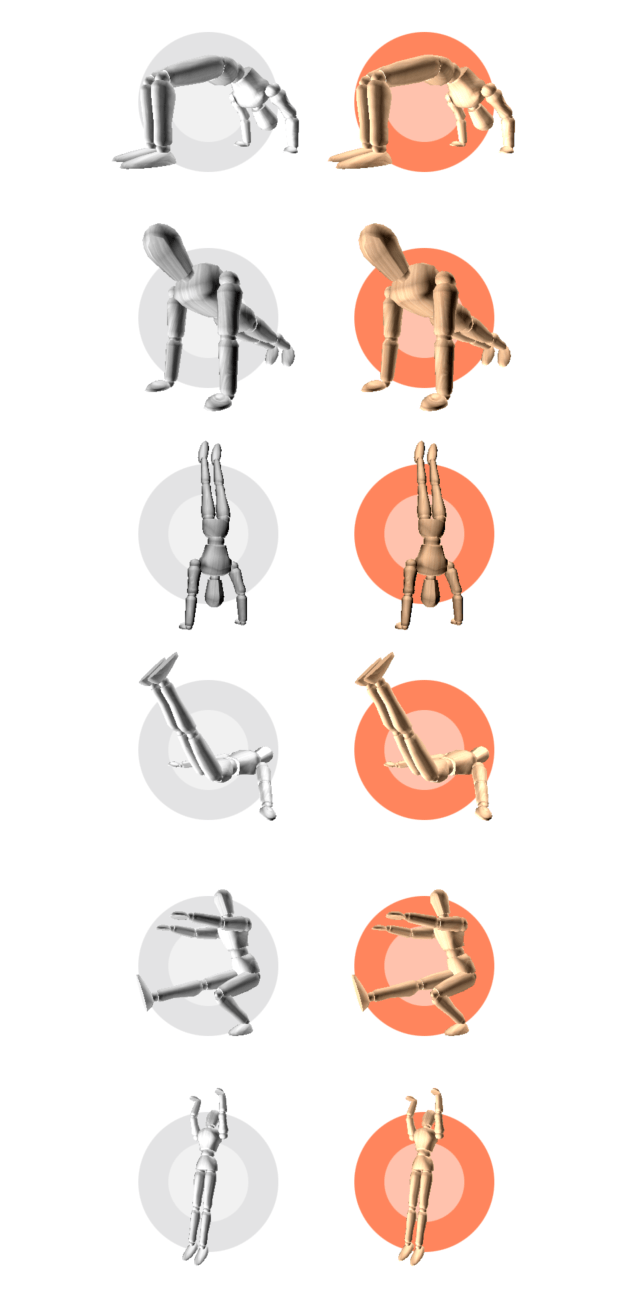
These icons make use of the animation view like so:
ZStack {
    Circle()
        .fill(complete ? Color.themeColor.opacity(0.8) : .gray.opacity(0.25))
        .frame(width: size * 0.7)
    Circle()
        .fill(.white.opacity(0.5))
        .frame(width: size * 0.4)
    AnimationView(progressionAnimationName: name, height: size, isPaused: true)
        .grayscale(complete ? 0.5 : 1)
        .contrast(1.5)
        .shadow(color: .white, radius: size * 0.01)
        .offset(calculatedOffsets)
}
.frame(width: size, height: size)
This applies two circles within a ZStack, and scales according to a given size double. For the name, I'm passing a pose version of each animation. Since it's paused, I created a version of each animation with just a few frames, which brought down the size of each pose animation file to about 300Kb.
I've learned it's possible to apply some interesting visual effect modifiers! Here I'm using greyscale for showing a desaturated version when the exercise is incomplete, I'm upping the contrast a bit, and even adding a white glowing effect with shadow.
The calculatedOffsets value is from a dictionary of offsets I used to nudge each pose into the right position relative to the center of the icon. These are also expressed in points adjusted for the given size value, so it remains consistent at any size.
I'm hoping to get one for each progression. It's a lot of files but they look great and can scale to any size.
Step 3: Views #
The structure of the app is simple enough - a home view containing today's exercises, a sheet that pops over to allow people to change each exercise's progression level, and another sheet where they can record the exercise.
I wracked my brain for a while on how to make this as simple as possible, and I think a decent approach is to have the idea of an "edit mode" within the home view. When in edit mode, selecting an exercise opens the change-progression sheet. Otherwise, selecting an exercise should let the user record an exercise.
It would be nice also if people can navigate through each day of the week (Mondays, Tuesdays, etc) and set the desired exercises to each day to manage the weekly routine.
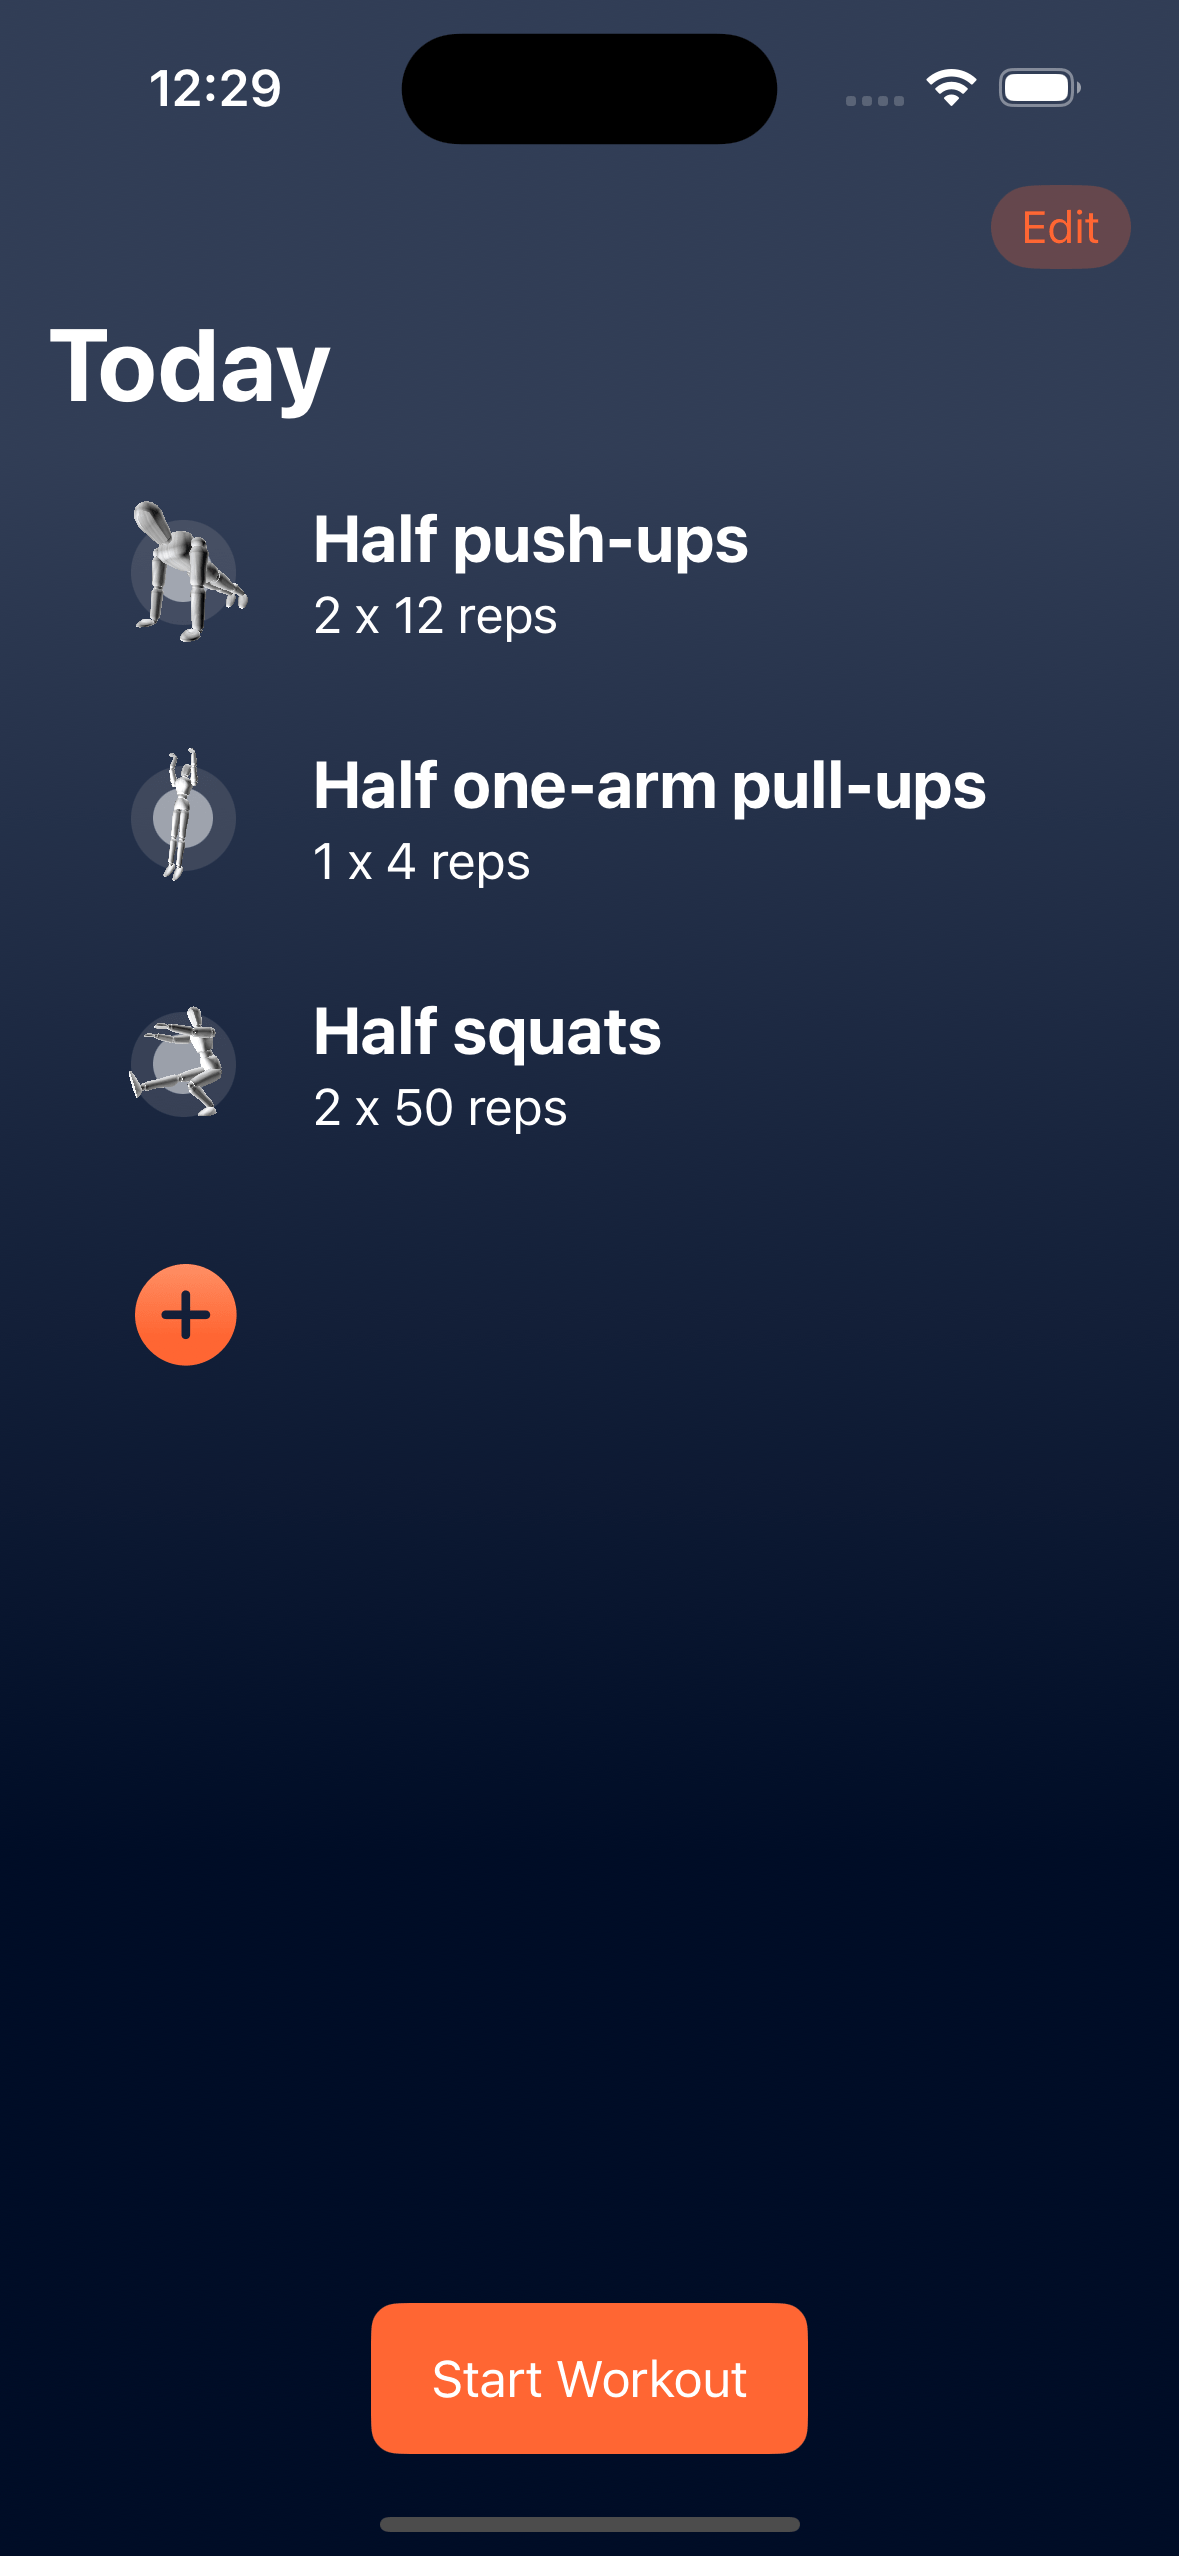
Home view #
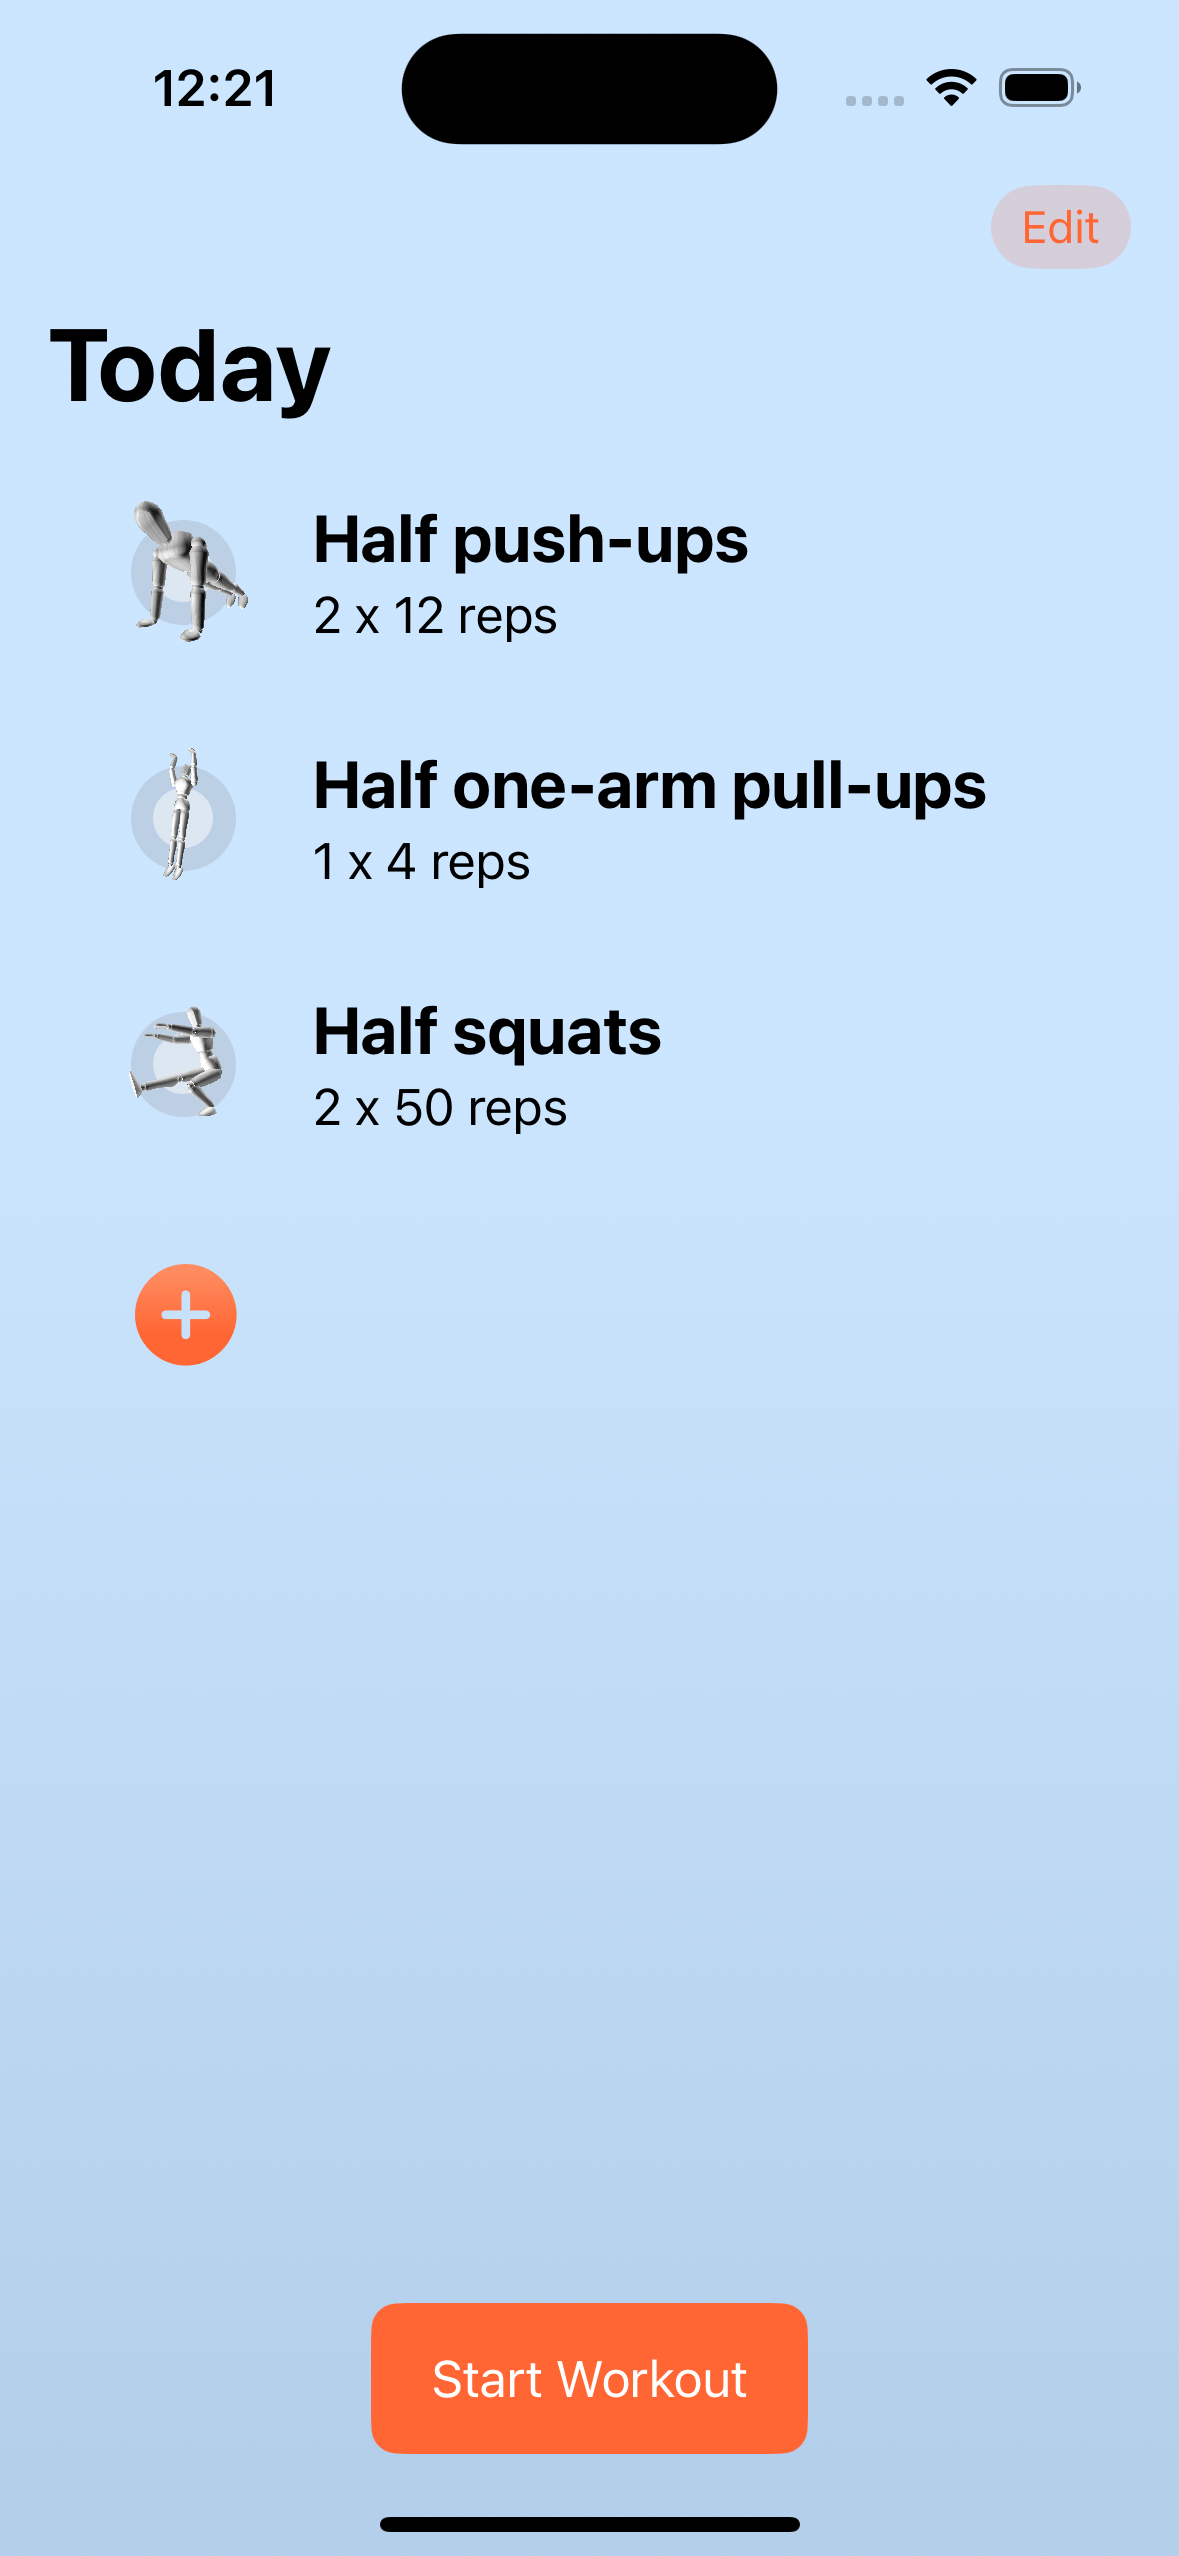
This is the main view of the app. It lists the exercises for the day. From here the main flow is to do a workout. Selecting an exercise or pressing the Start workout button opens the "record exercise" view in a sheet.
Displaying exercises #
To show the right progressions, I make use of two objects persisted to UserDefaults. One being a dictionary of exercises by day as [Int: [ExerciseType]]. Each day of the week represented by an Int then stores an array of exercise types.
This allows me to list the right types of exercise for each day. To display the correct exercise progression, I have a store a dictionary of UserExerciseStages. For each ExerciseType I store the level and stage. I can then use that to ensure the correct progression is shown.
I store these both in UserDefaults as the amount of data needed is small enough not to need a larger store.
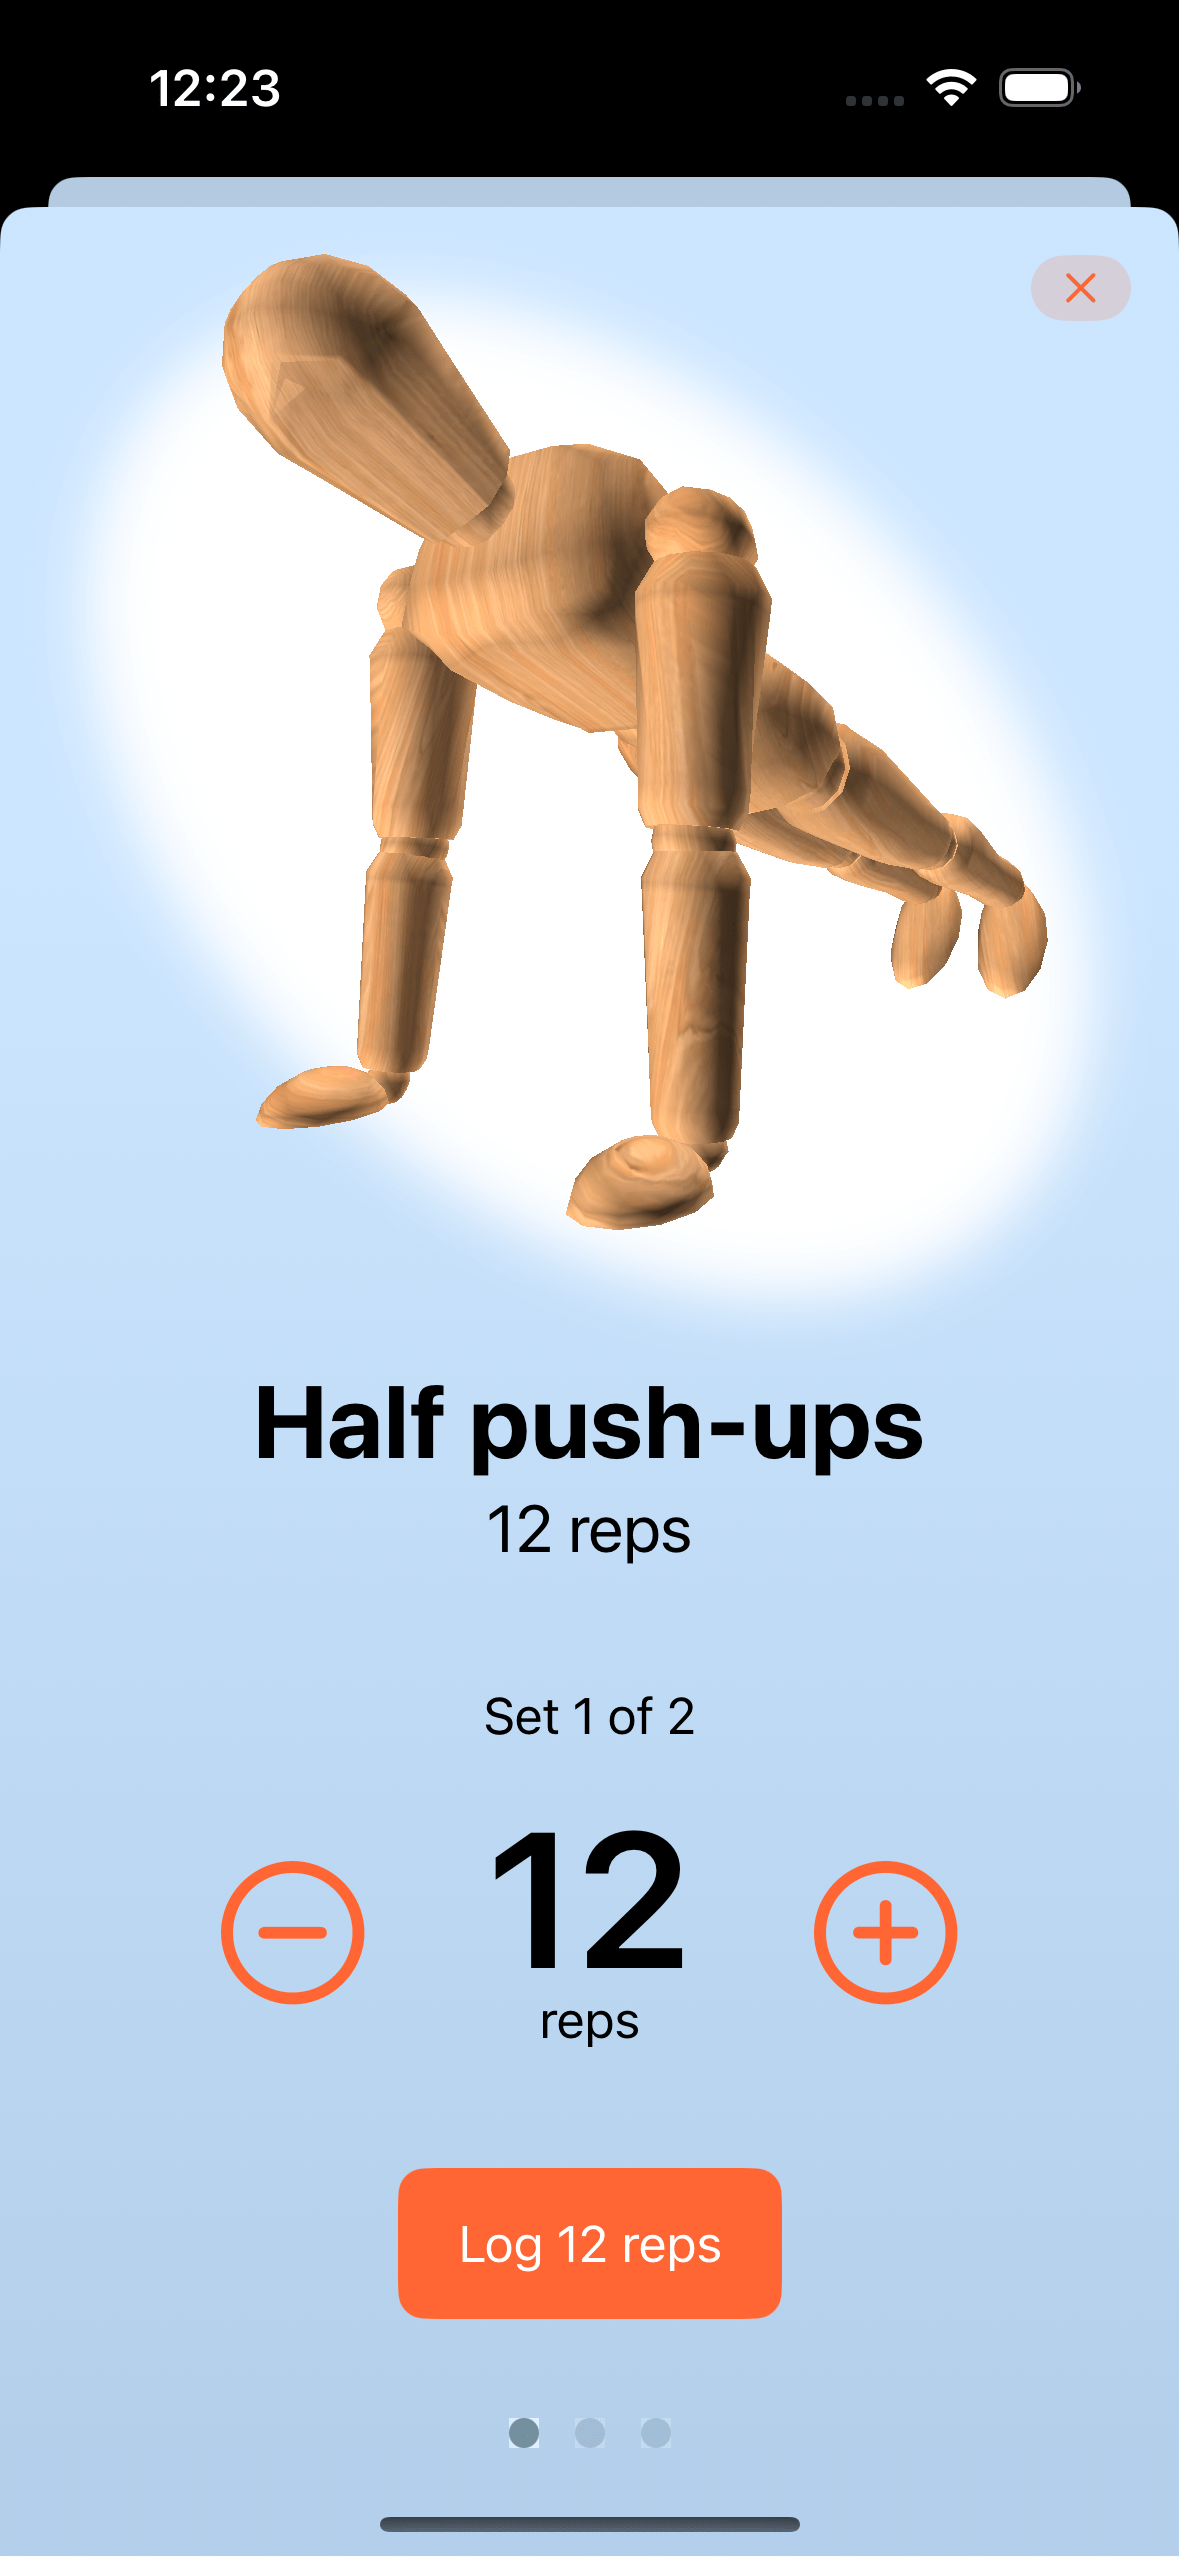
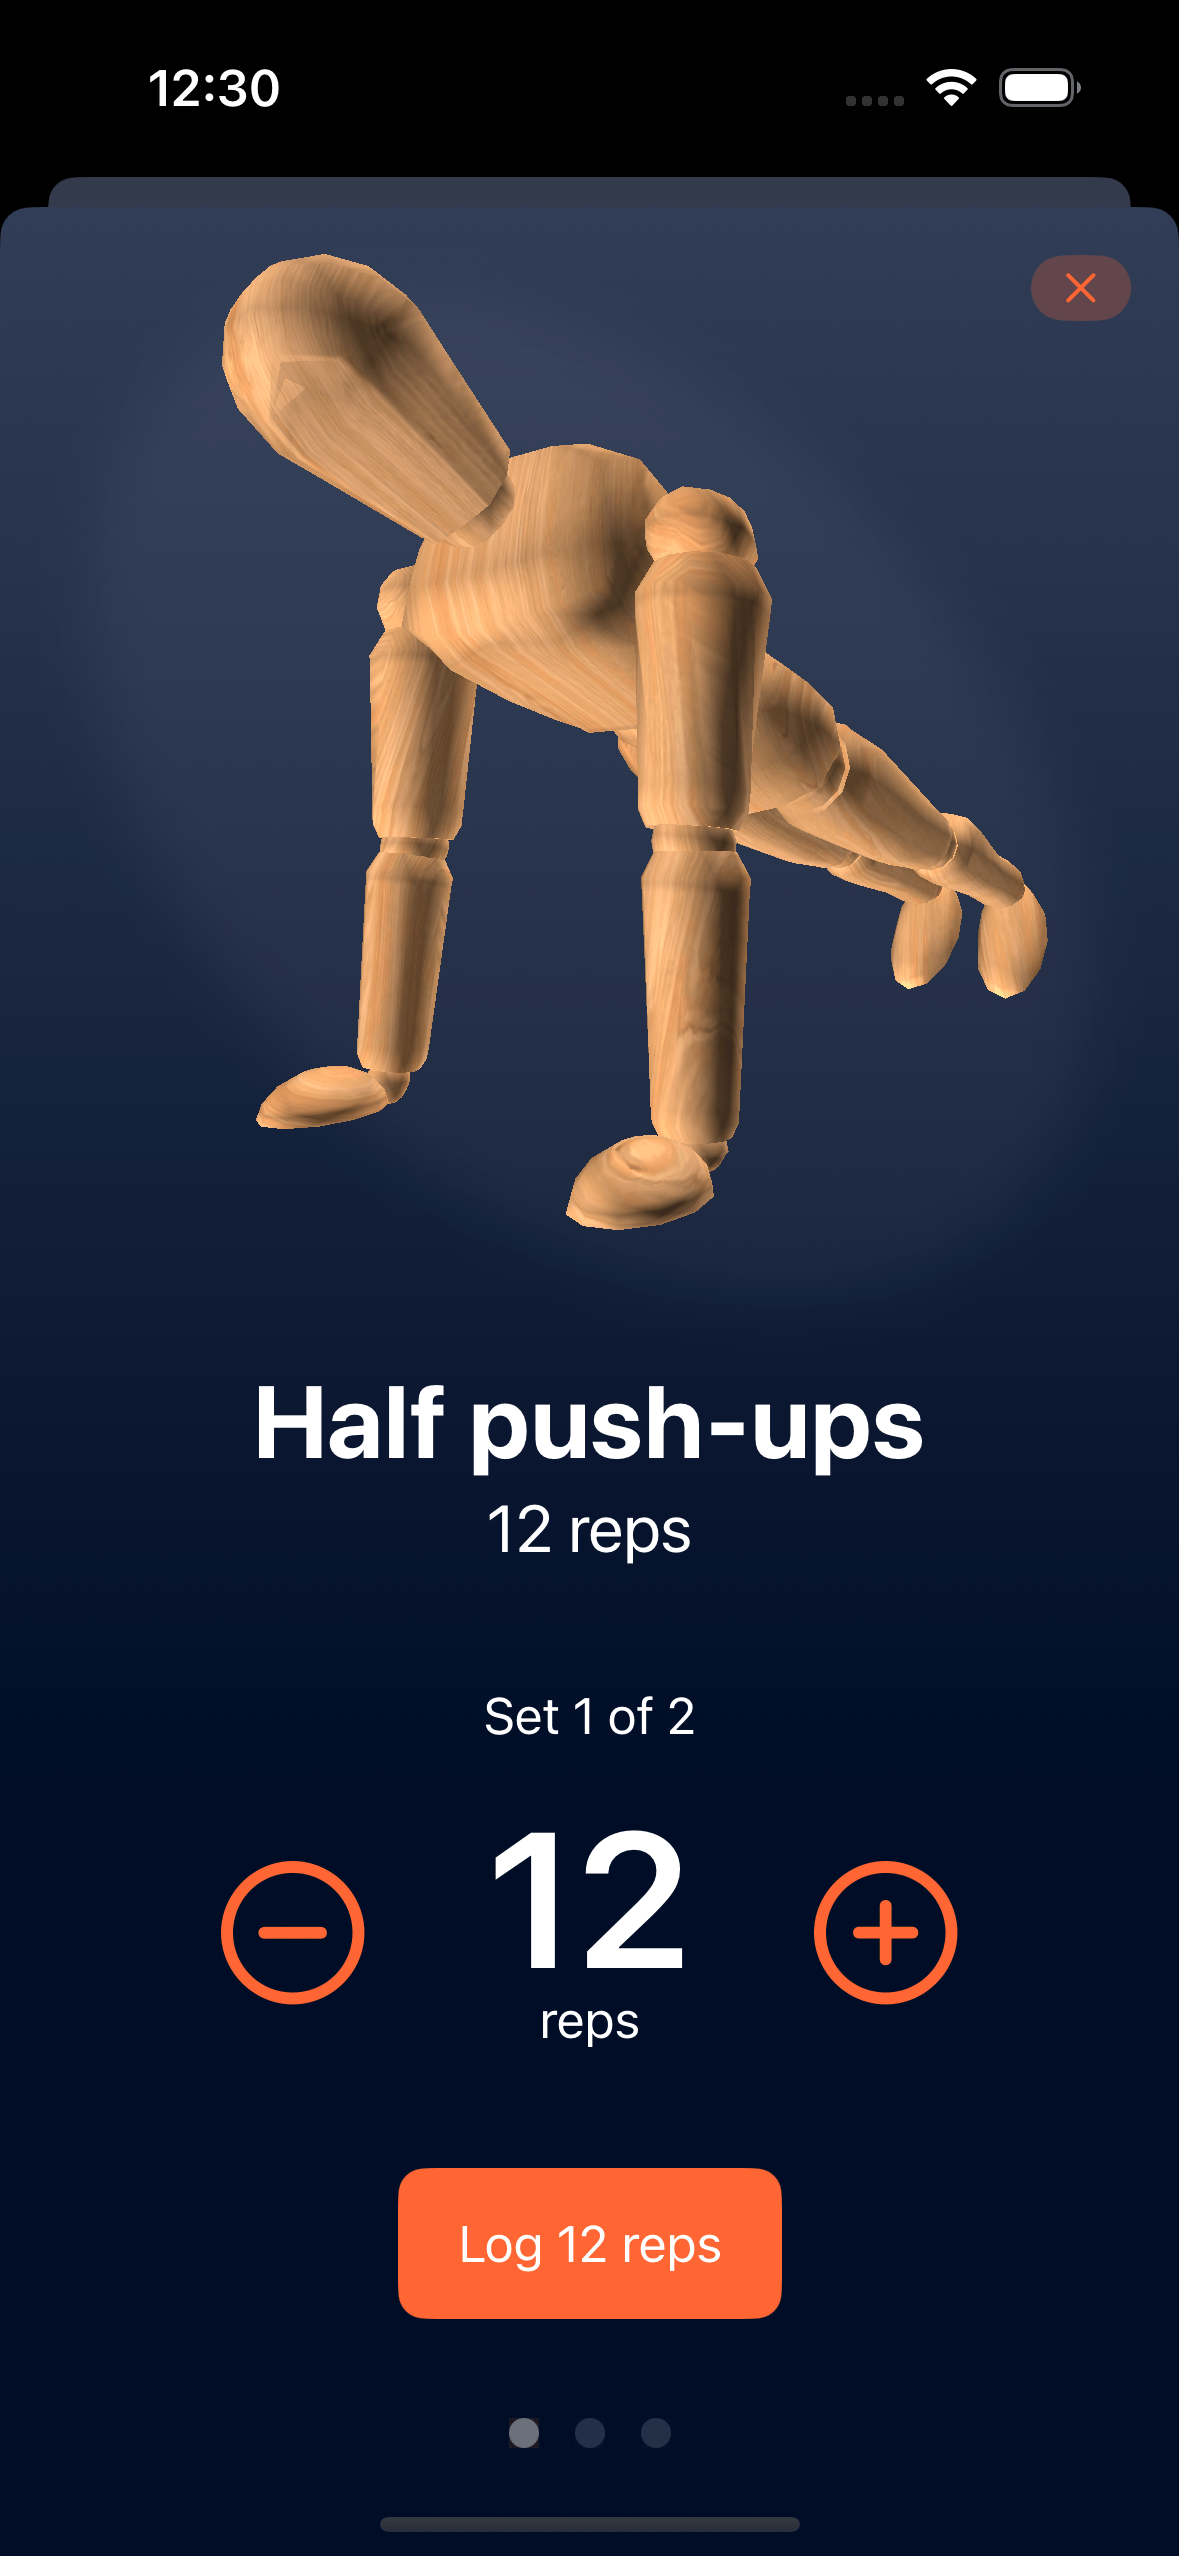
Recording exercises #
The content of this sheet makes use of a view I called ProgressionViewer. It allows for scrolling through a series of progressions, and performing actions on them.
ProgressionViewer #
The main scrolling takes place in a ScrollView that I control using ScrollViewReader:
ScrollViewReader { scrollViewValue in
    ScrollView(.horizontal, showsIndicators: false) {
        HStack(spacing: 20) {
            ForEach(progressions, id: \.self) { displayProgression in
            //... display the progression animation, title, etc
            }
            .id(displayProgression)
            .frame(width: geo.size.width)
        }
    }
    .onPreferenceChange(ViewOffsetKey.self) {
        // Calculate the currently shown index
        // and update the animation file name
        // offsets, etc
    }
    .scrollTargetLayout()
This makes use of id set to the given progression so that I can scroll to it when needed, using:
scrollViewValue.scrollTo(progression)There's also a useful trick of making use of onPreferenceChange and a ViewOffsetKey change. This StackOverflow answer gives more details.
This allows me to do handy stuff like adjusting the offset of the animation when scrolling, or highlight the currently active step in the set of circles along the bottom of the screen.
One detail to note: I'm not displaying an animation on each of the scrolling items. I found that was heavy to try to display up to 10 side by side, so instead I have one animation and I update the animation name based on scroll position when the animation is hidden with opacity.
Saving to the journal #
Using the stepper to select the number of reps updates the displayed number both in the text and the button. Pressing the button then calls a function that saves a journal entry. This is made up of date, exercise details and reps. For this I use SwiftData. This is a fairly painless way to save the values and persist larger data sets than would be possible with UserDefaults.
Adding exercises #
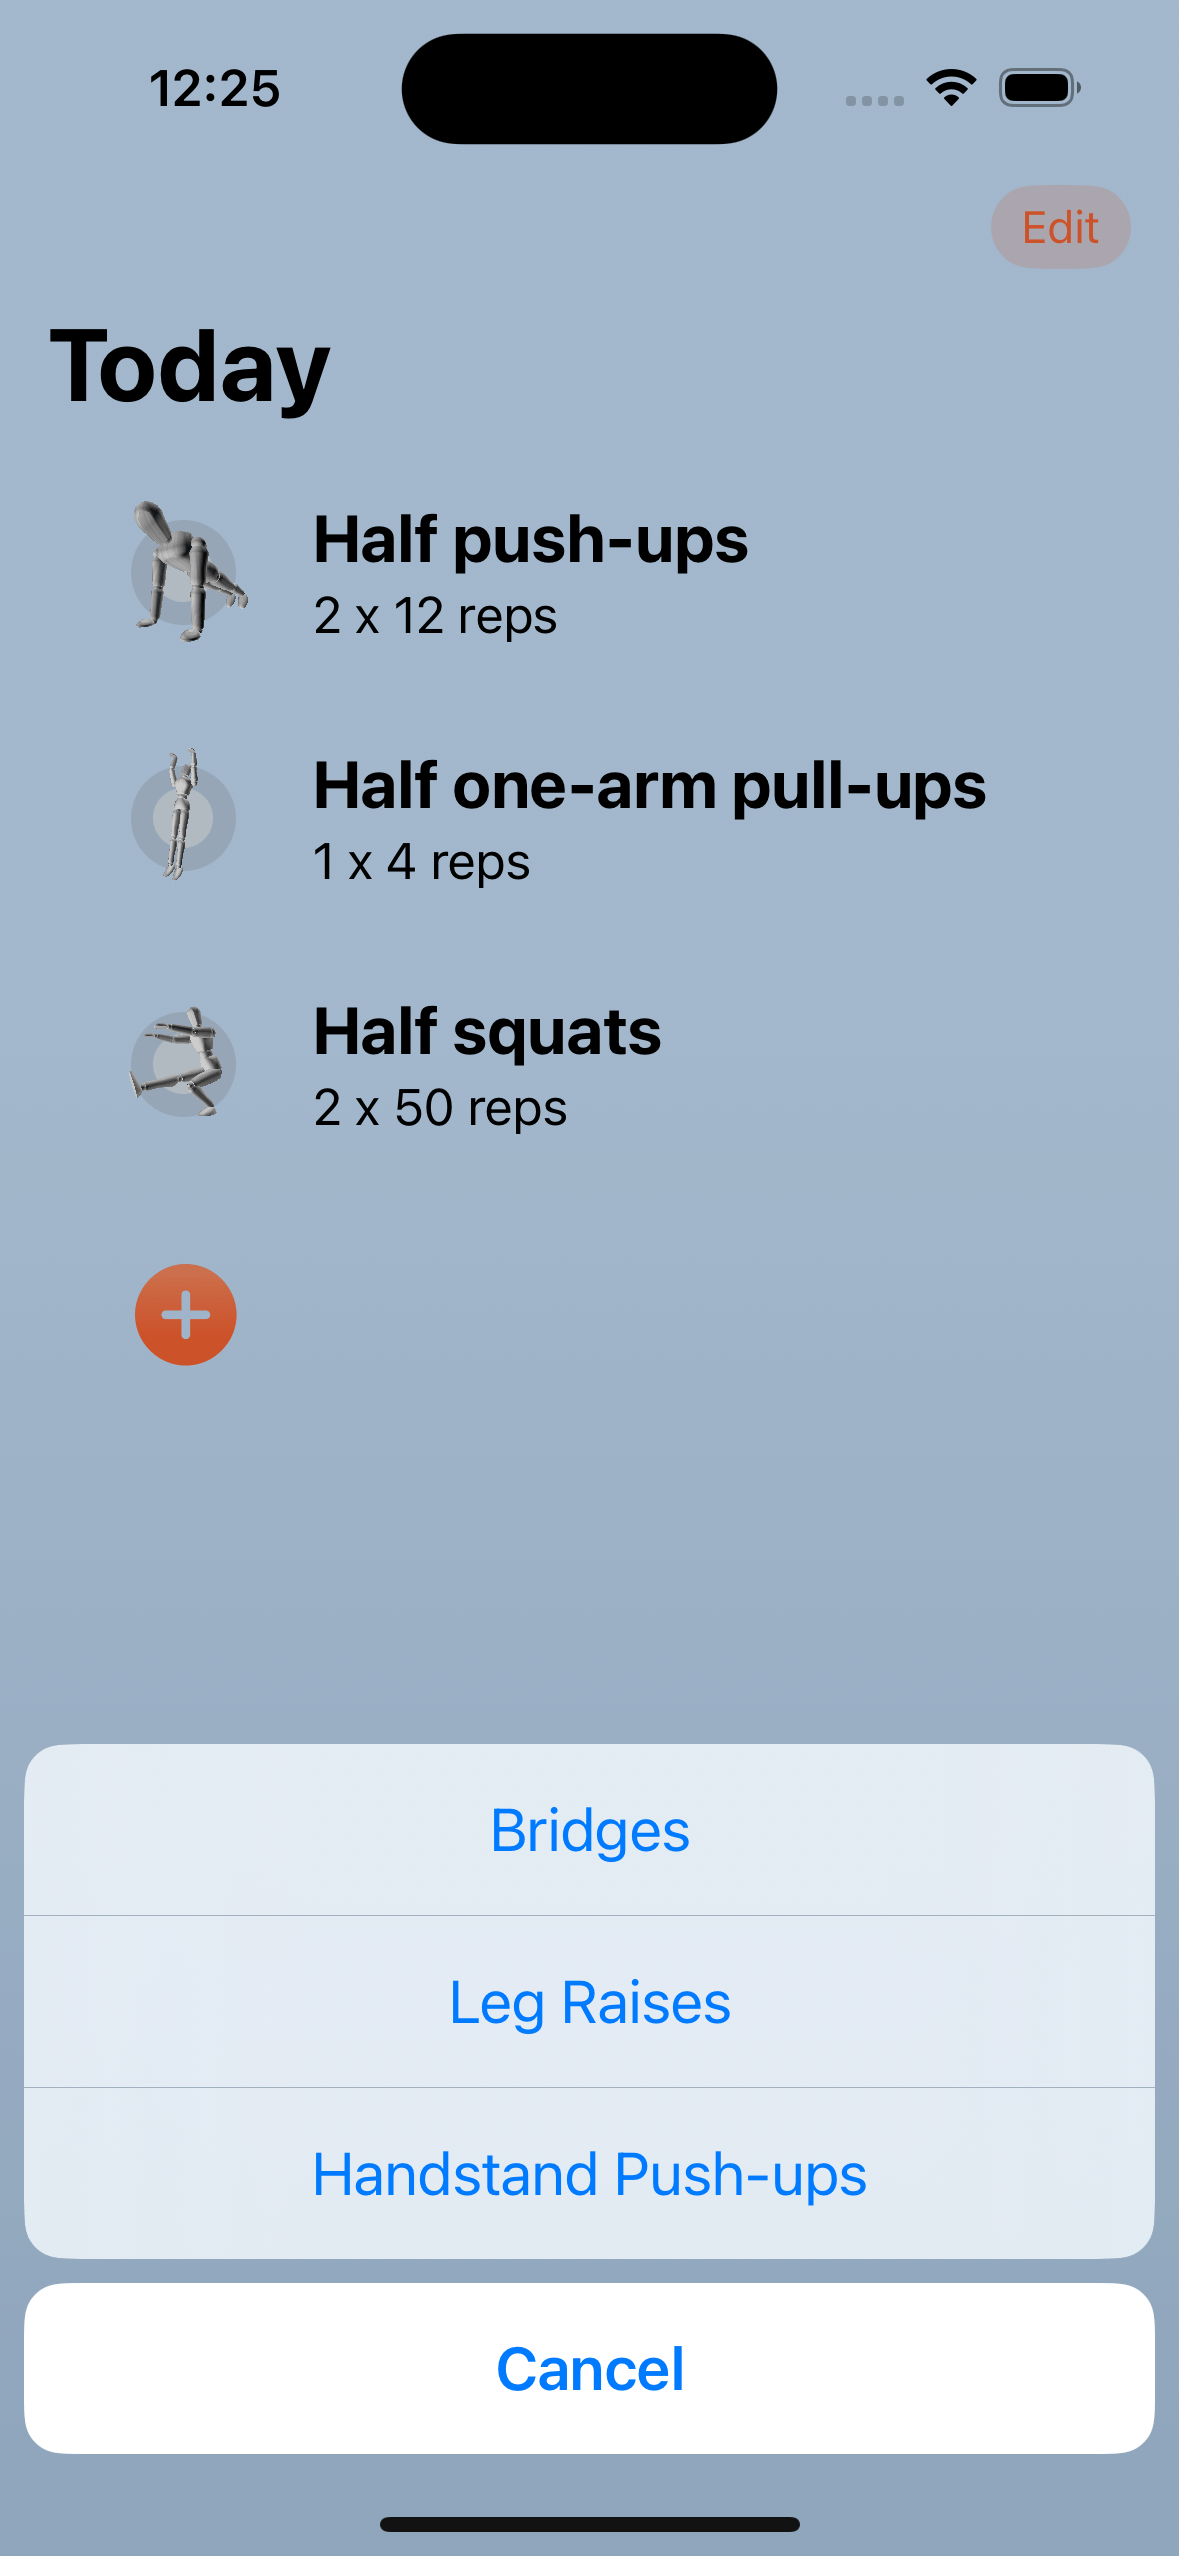
Selecting the + shows a confirmation dialog containing exercise types that aren't currently in the day's routine. To keep the structure of the app simple, I chose to allow one of each type of exercise per day. Users can log more sets if they wish, or adjust the level if it's too easy or hard.
Empty state #
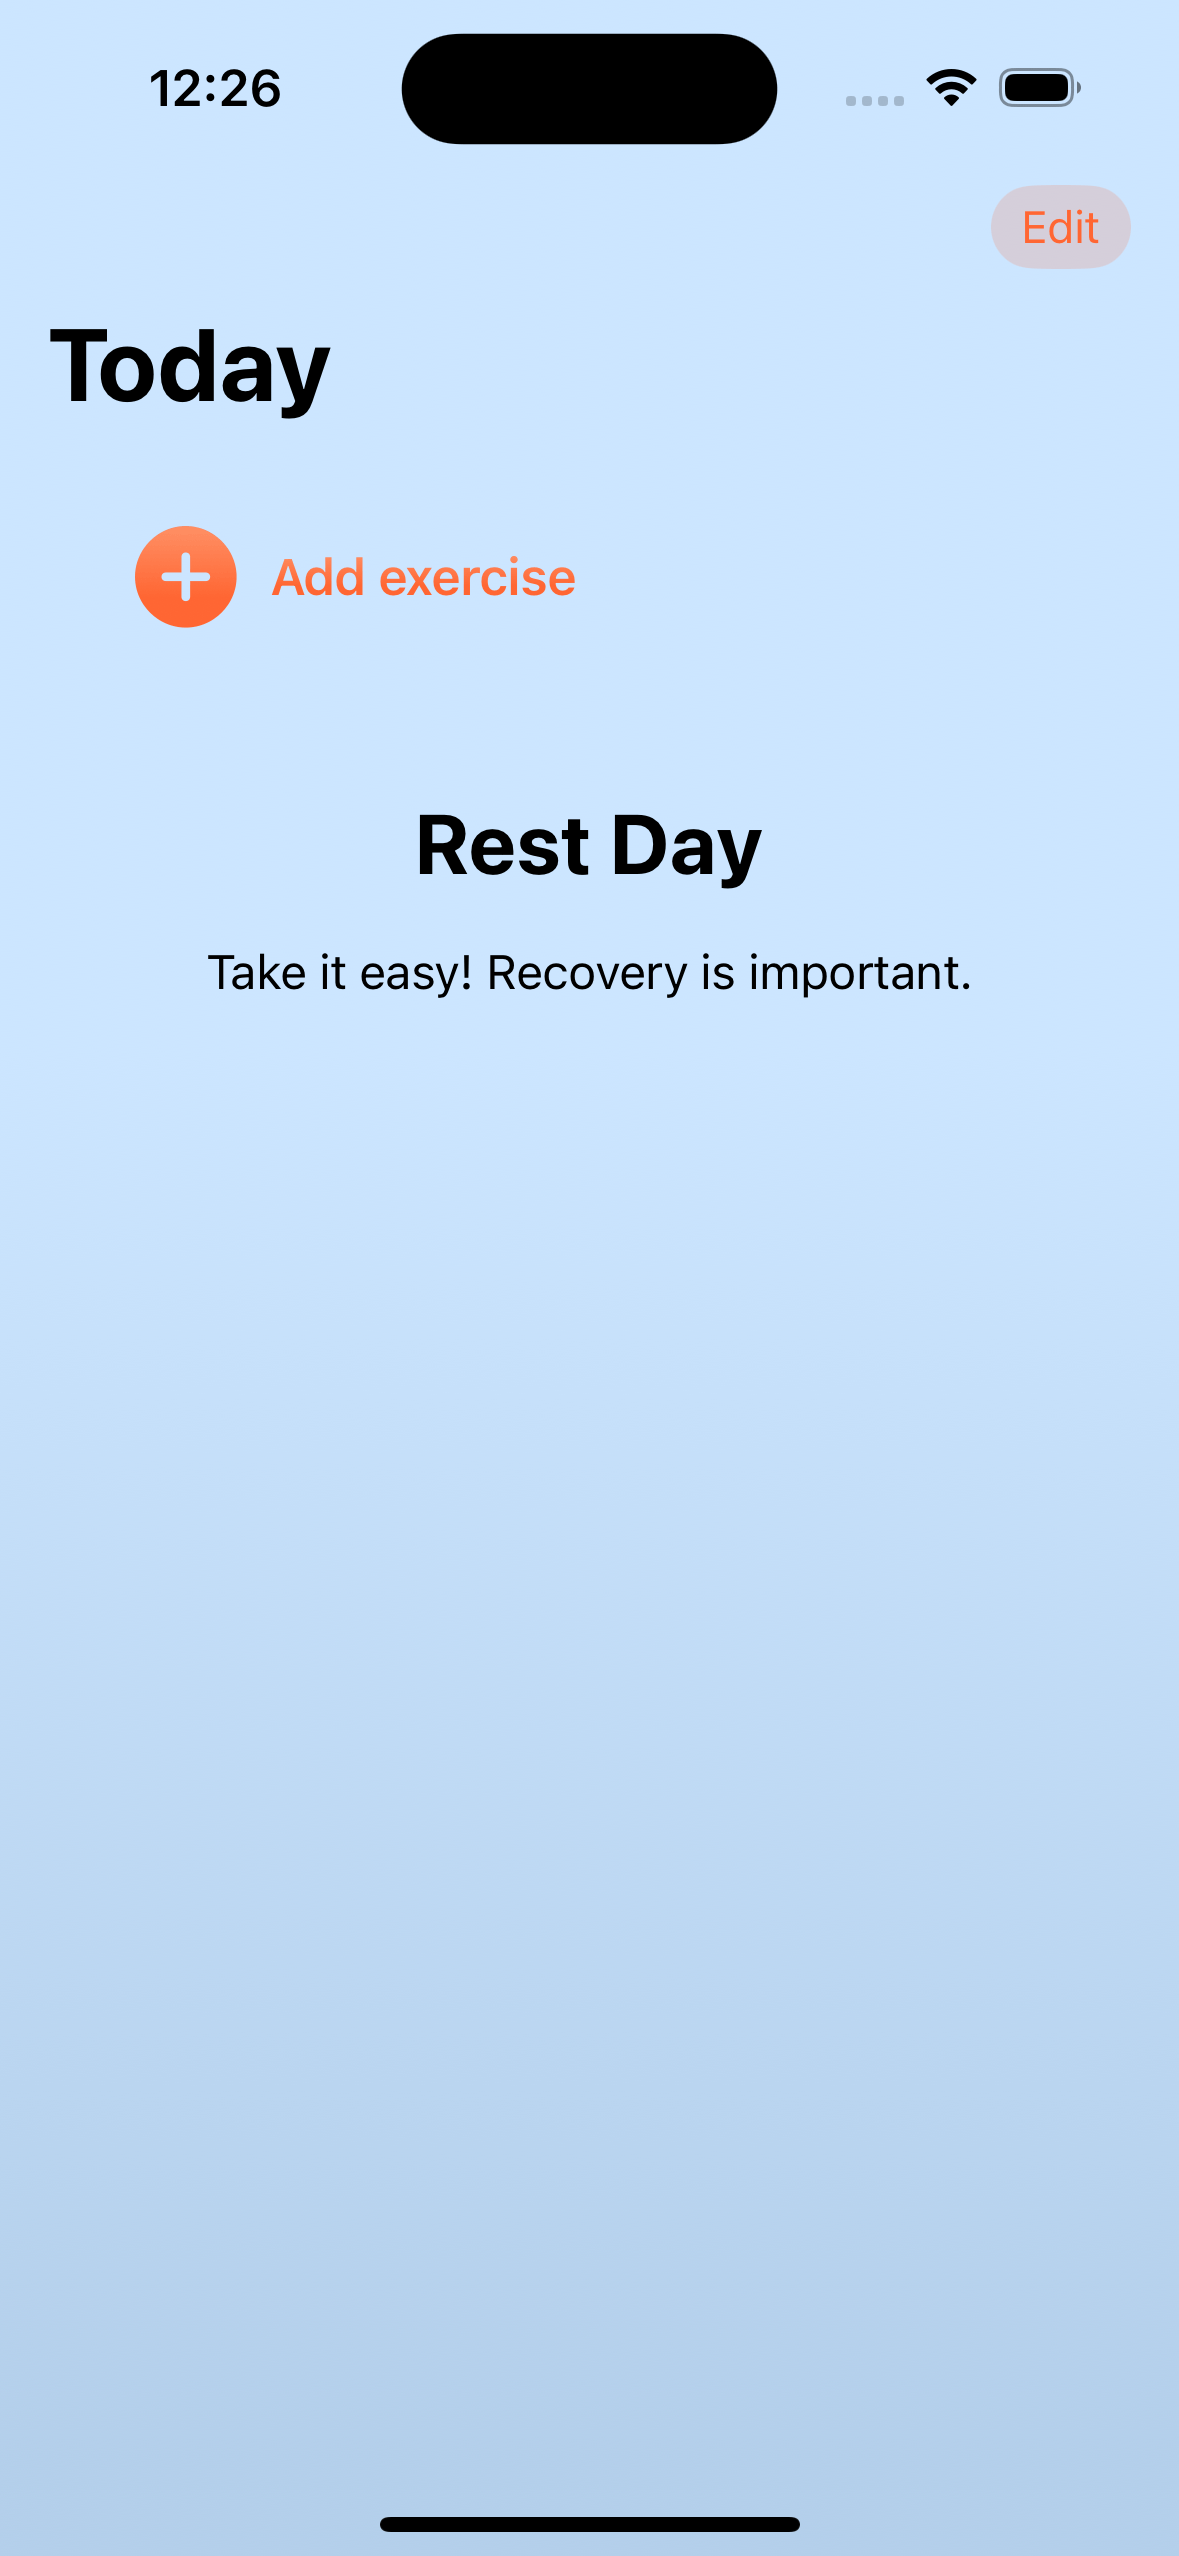
Empty states are an important part of any UI. I will need to add more to this screen but to make it nicer but it's good to have some kind of message to let the user know that the view isn't broken.
Edit mode #
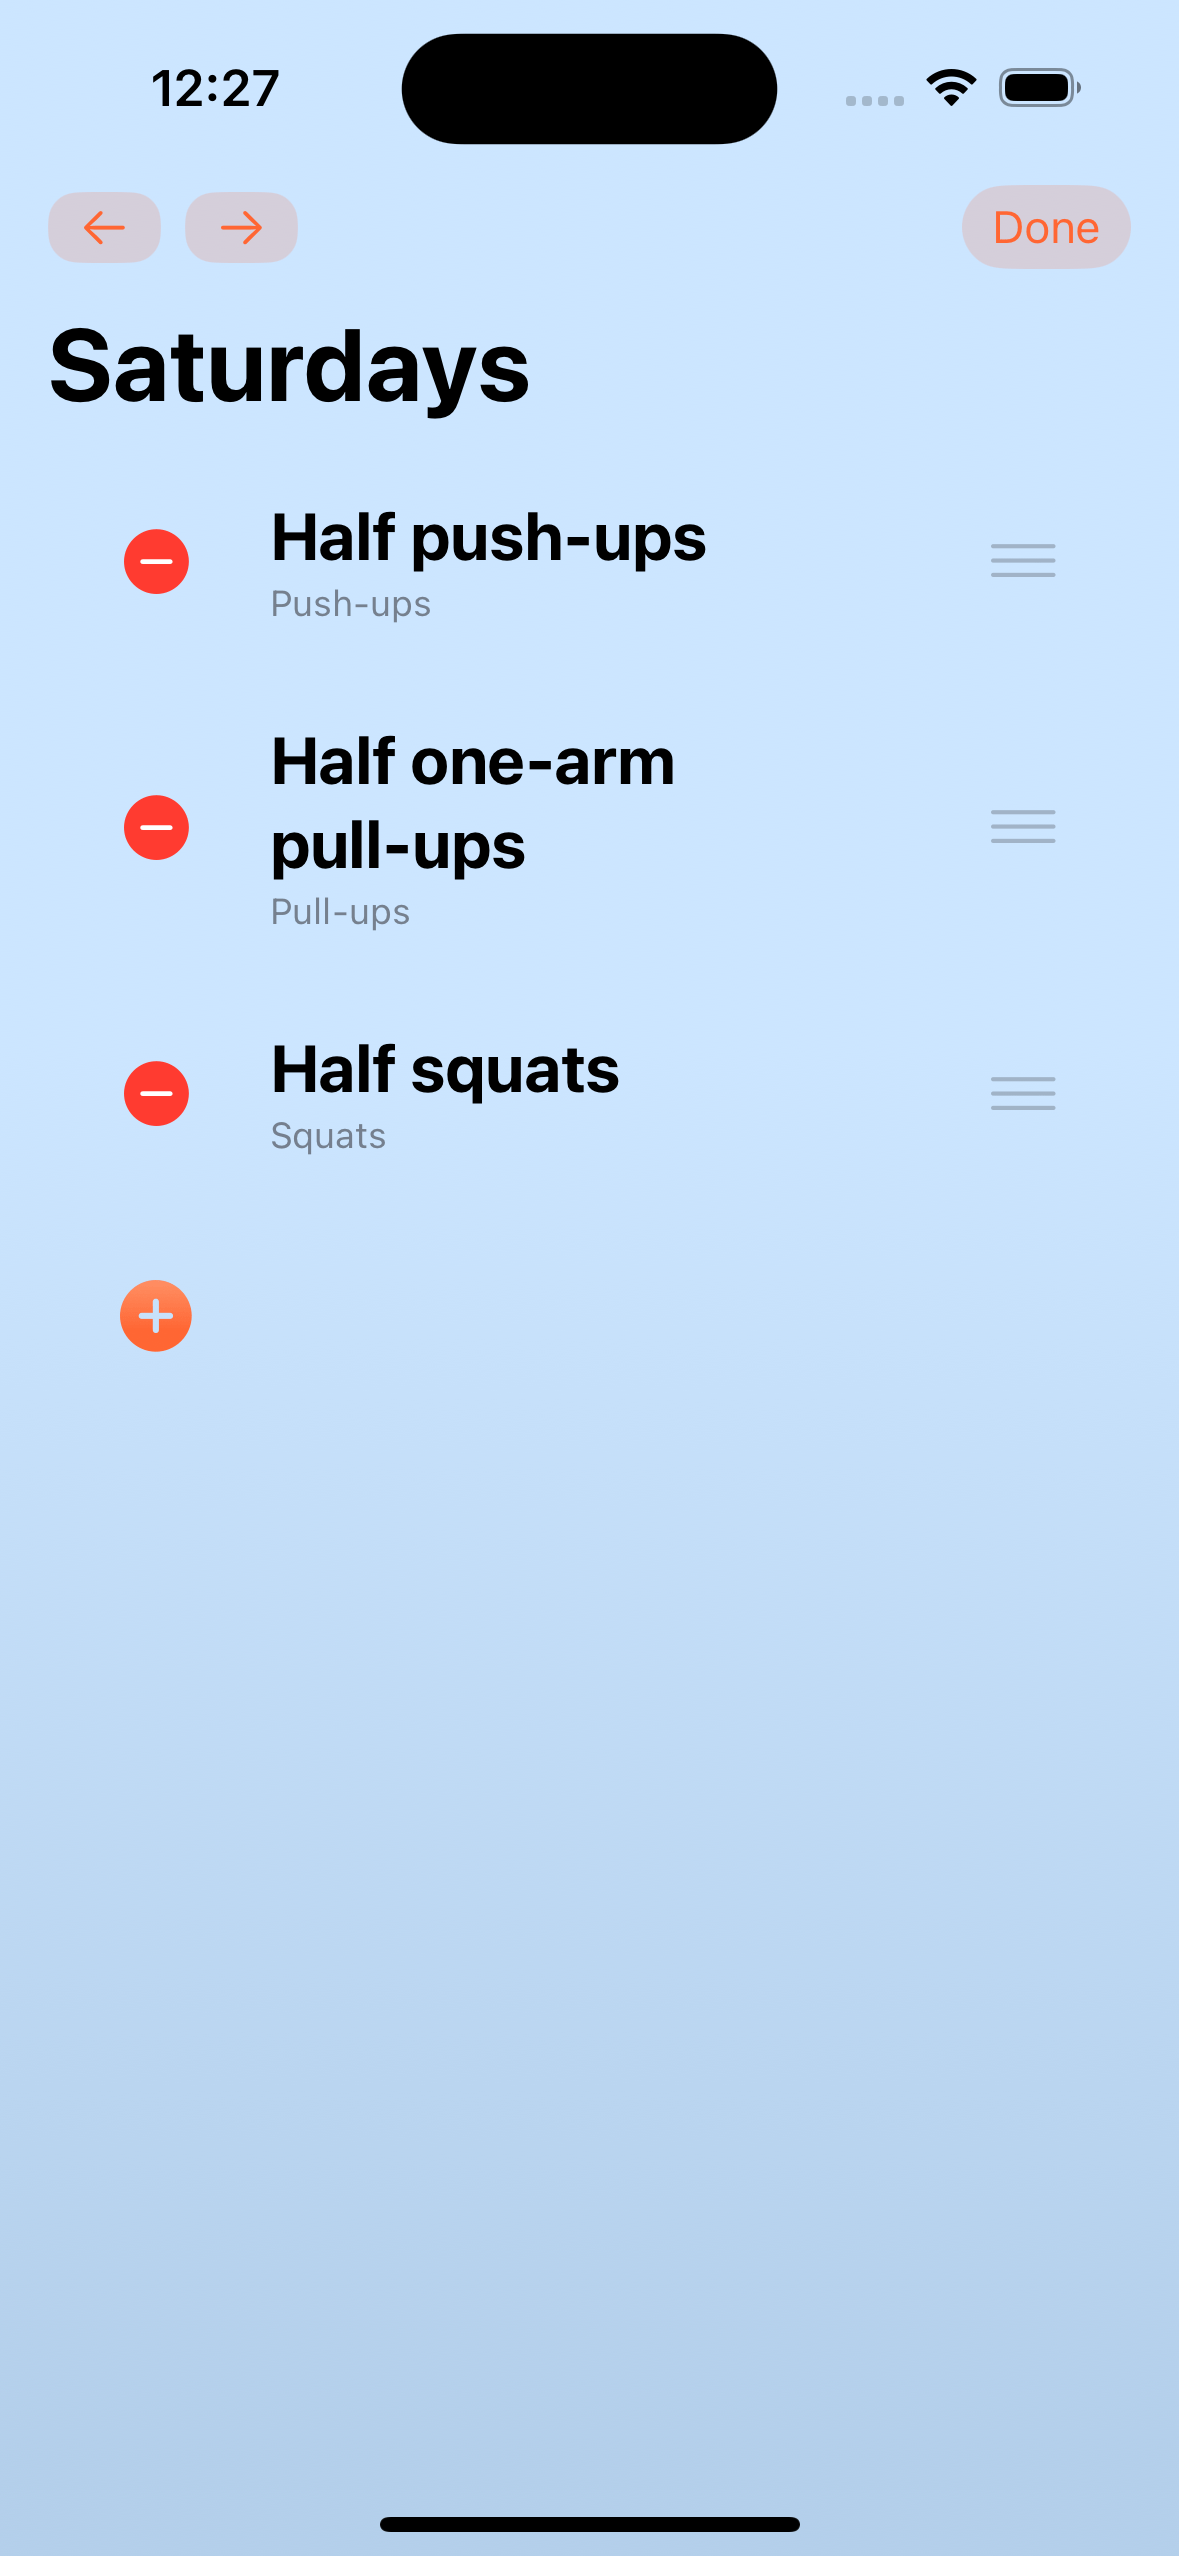
On the home view pressing Edit makes the list change to show delete and reordering UI. When in edit mode, I add in buttons to navigate between days. Selecting any of the exercises opens a ProgressionViewer view in a sheet but with the set of progressions being shown being the other stages of that exercise type.
Changing progressions #
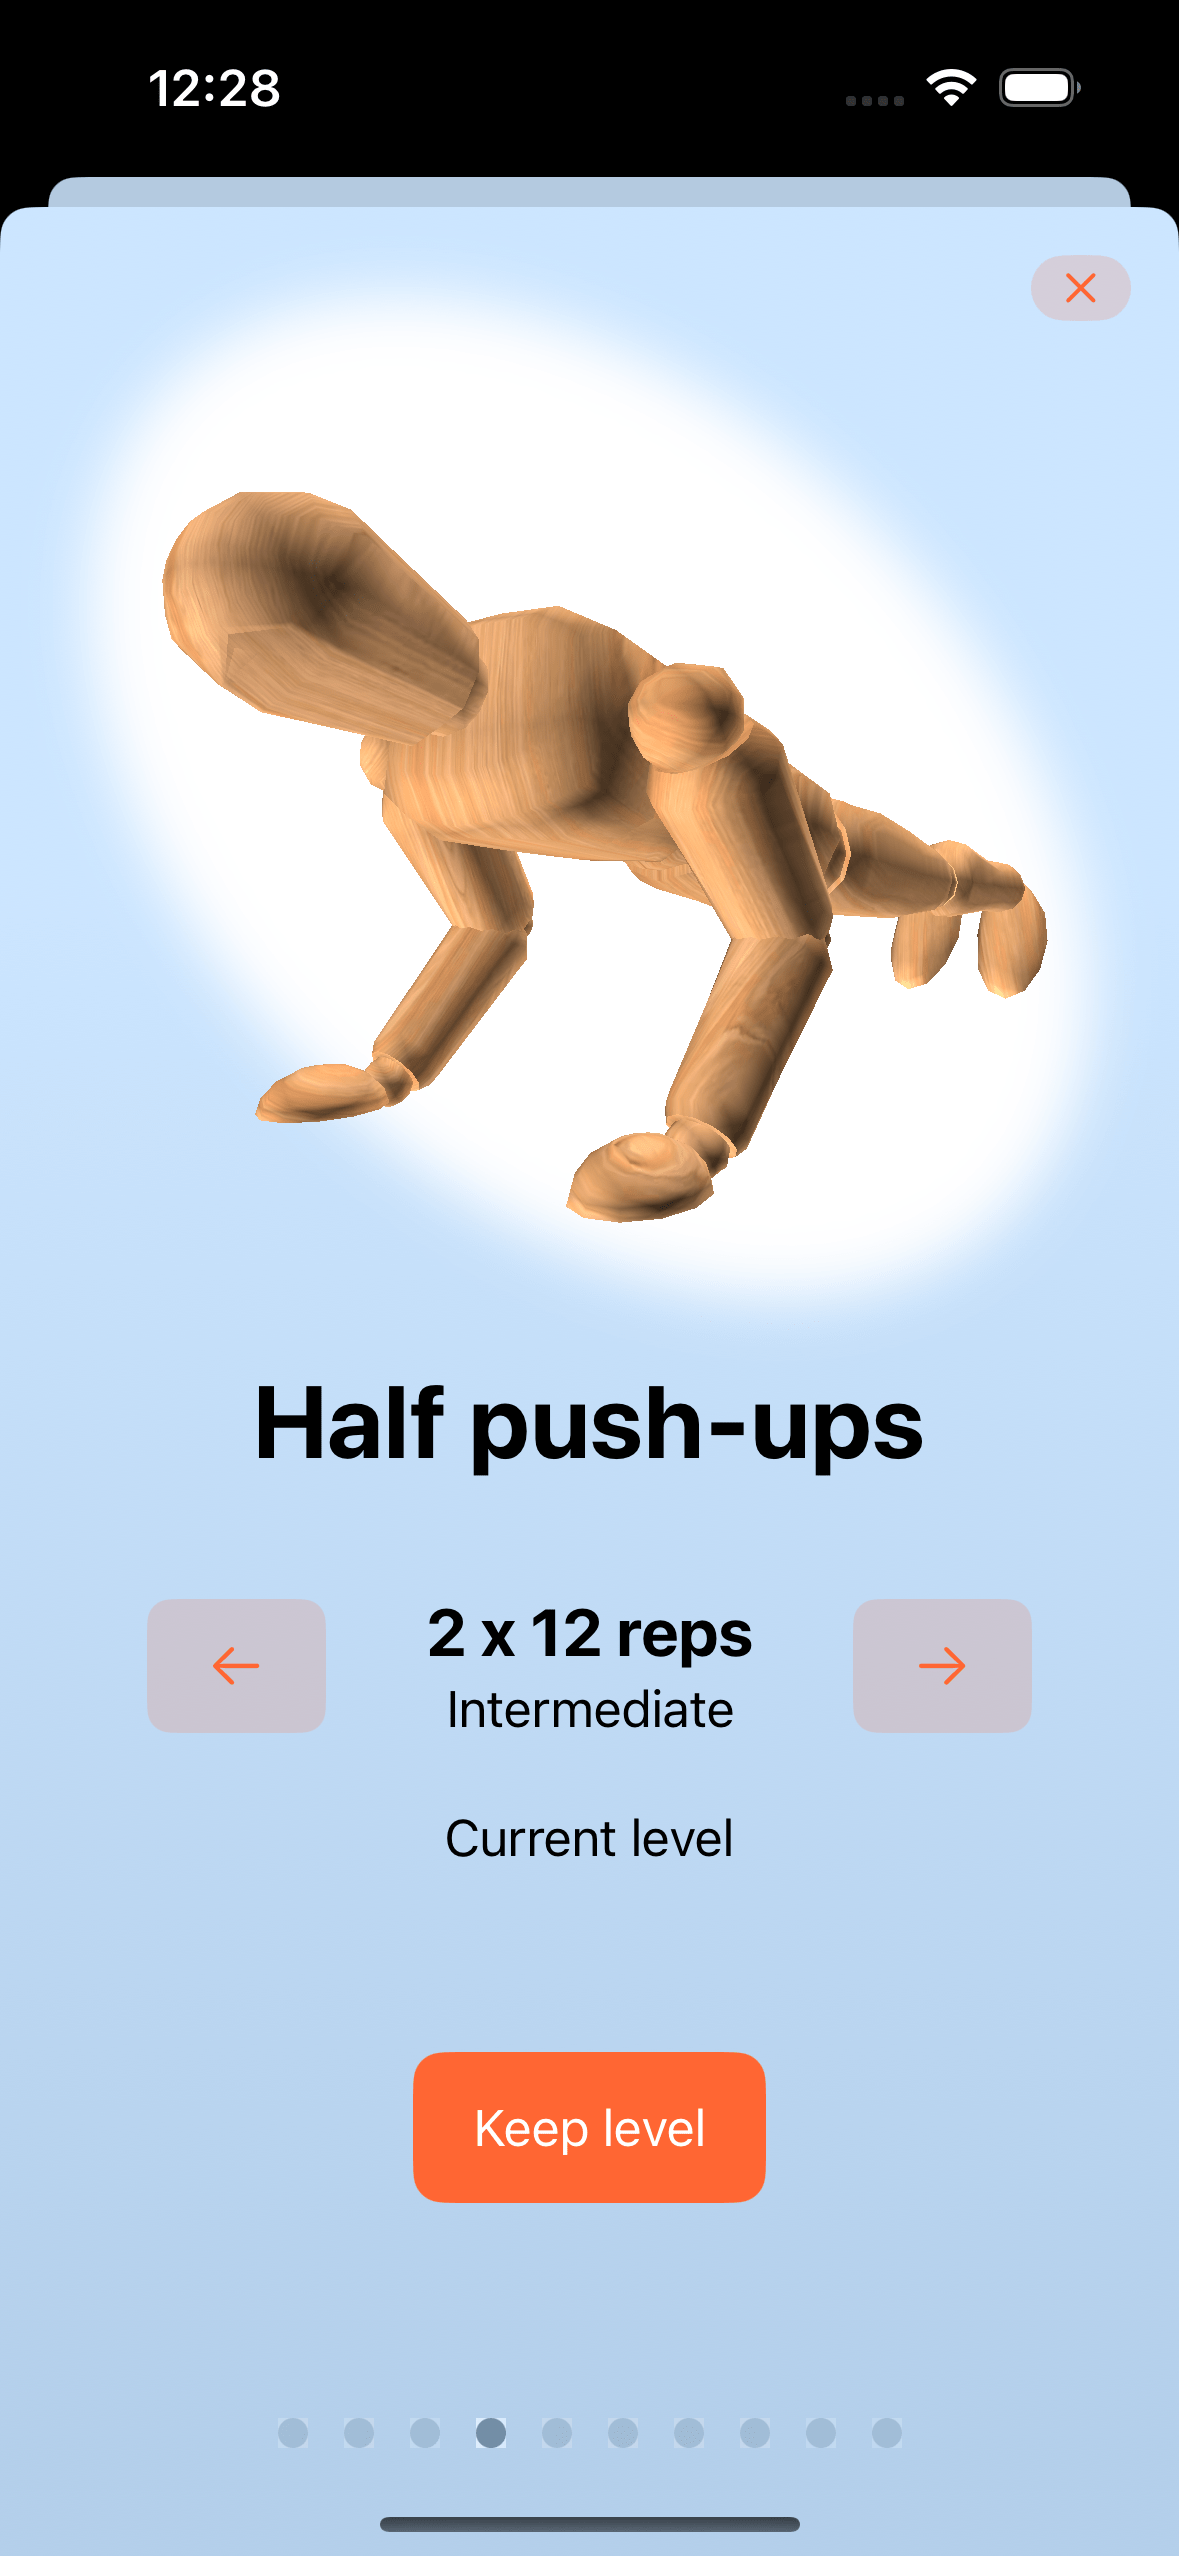
The left and right arrows move between levels and stages, and the stages can be scrolled through also. Then the chosen level saved, which updates the UserExerciseStages stored data.
This is then reflected across any instances of that exercise type through the rest of the week.
Step 4: Styling #
This being my first app I'm working things out as I go in terms of how it looks. I'm aiming for it being simple, ideally a little fun, but bright and clear. This is something that will definitely evolve.
When styling the list items, I found this Youtube video from Karin Prater very helpful.
Colors settings #
Rather than specify a lot of colours everywhere, I set up a Colors.swift file where I can extend Color:
extension Color {
    static let themeColor = Color(red: 1, green: 0.4, blue: 0.2)
    static let lightBg = Color(red: 0.8, green: 0.9, blue: 1).gradient
    static let darkBg = Color(red: 0, green: 0.05, blue: 0.15).gradient
    static let lightAnimationBg = Color.white
    static let darkAnimationBg = Color.white.opacity(0.05)
    static let secondaryButtonBg = themeColor.gradient
}
This will act as a central place for storing the theme. For version 0.1 I am ok with it but it definitely needs more polish.
Light and dark mode #
The Color values include light and dark. I'm not sure yet how well this will work but I'm swapping out these in the various backgrounds and foregroundStyles using @Environment(.colorScheme).
Next steps #
This post reflects a lot of work over 6 months. There's lots more to do before I'll be able to set up a Testflight and start getting some user testing. Some things I'd like to have before then:
- Onboarding screen for helping build a starting routine
- Icons, so many icons (one for each progression)
- Set up primary and secondary button styles to tidy the code a bit
- Add in an (initially empty) journal view to surface some useful stats or graphs
- App icon, other small details
I'll try to do a regular update here. By reading this you're providing me with much-needed accountability!
- Next: TestFlight & Timers